
In today’s society, with the growing importance of sustainability and eco-consciousness, an increasing number of people are embracing organic gardening methods to minimize their impact on the environment.
Creating your own organic fertilizer is a key element in cultivating a flourishing garden. By focusing on the soil’s fertility, you can ensure optimal conditions for your plants to thrive. By adopting the principles of recycling and utilizing natural ingredients, creating your own organic fertilizer not only promotes a healthier garden but also reflects a dedication to chemical-free and environmentally conscious cultivation.
In this detailed guide, we’ll delve into six straightforward steps to assist you in starting the process of creating your own organic fertilizer.
Step Number 1: Gather Ingredients
Now that you’re prepared to start your gardening journey, it’s time to assemble all the components required to make your homemade organic fertilizer. You can nourish your plants and create beautiful results in your garden by carefully choosing and combining specific materials.
As you gather the ingredients, take a moment to decide what kind of organic fertilizer you want to make. Understanding the varying nutrient requirements of different plants will help you select the appropriate ingredients for your fertilizer mixture.
Knowing the particular requirements of your plants will help you choose the right ingredients, whether you’re going for a phosphorus-heavy mixture to encourage flower production or a nitrogen-rich blend for leafy greens.
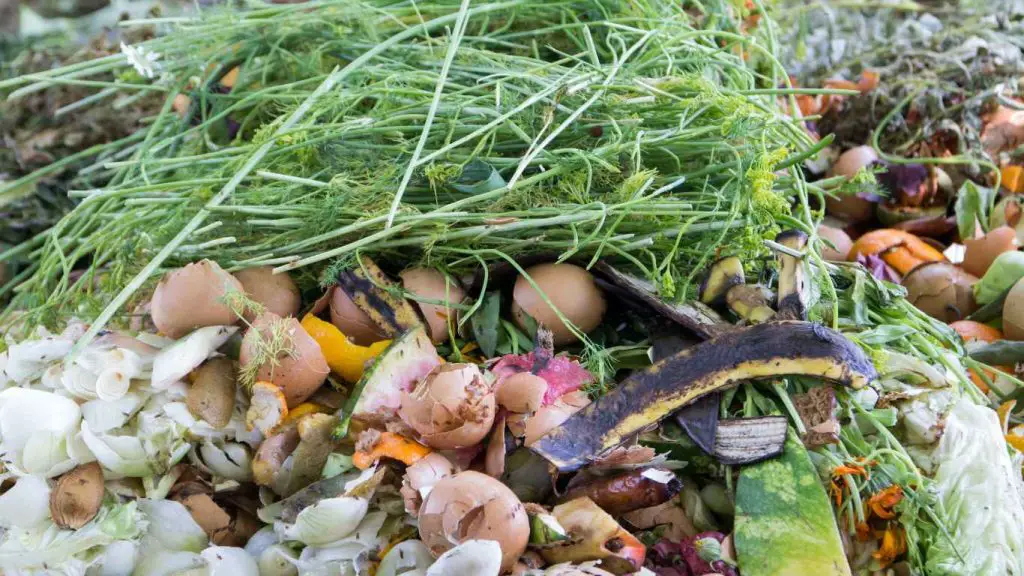
Next, examine your surroundings more closely. Which natural materials are readily available to you? You can make a lot of organic fertilizers in your kitchen or backyard with items you already have.
For instance, kitchen scraps, leaves, and grass clippings can all be excellent sources of nutrients. You can recycle these materials and make a rich, nourishing base for your fertilizer by allowing them to compost or decompose.
To further enhance your fertilizer blend, you might also think about adding other organic matter, like manure or bone meal, in addition to natural materials.
These products, which can be bought from nearby farms or garden centers, offer a concentrated source of nutrients. To maintain the overall sustainability and health of your plants, don’t forget to select organic sources.
Finally, remember the significance of water in your fertilizer mixture. Nutrients can more easily reach the roots of your plants when they are carried by water. A well-balanced and potent organic fertilizer will be produced if you have access to clean water during the entire fertilizer-making process.
Step Number 2: Chop and Shred Materials
Breaking down and reducing the size of materials prior to composting can speed up the composting process and enhance the overall quality of your compost. There are multiple factors that contribute to this:
Increased Surface Area: When materials are chopped or shredded, their surface area is increased. This allows for an increased number of access points for microorganisms, bacteria, and fungi to decompose the material into compost. Smaller particles decompose more quickly.
Faster Decomposition: Smaller particles break down faster due to their increased surface area, which promotes microbial activity. By implementing this method, you can accelerate the composting process and achieve finished compost more quickly.
Balanced Decomposition: By chopping or shredding, you can achieve a better balance between green (nitrogen-rich) and brown (carbon-rich) materials, resulting in a more harmonious mixture. Having a proper balance is essential for effective composting and guarantees that the compost pile maintains the correct carbon-to-nitrogen ratio.
Improved Aeration: Smaller particles help to enhance aeration by creating air pockets within the compost pile. Proper aeration is crucial for the functioning of aerobic microorganisms, as they rely on oxygen for decomposition. Ensuring adequate aeration is crucial in preventing the development of undesirable smells caused by anaerobic conditions.
Step Number 3: Choosing the Right Composting Method
First, let’s gain a better understanding of the various methods of composting before we delve into the process of composting at home. In general, there are two methods available for composting: cold (passive) and hot (active) composting.
Cold or passive composting: Composting through the cold or passive method requires minimal upkeep, although it may take longer to see the desired outcomes. The events occur in typical outdoor weather conditions.
This process is classified as anaerobic as it involves the breakdown of waste through fermentation by microorganisms that do not require oxygen. By continuously building upon your stack, the lowermost material will become readily available for use.
There is no need to aerate the pile. Be cautious of plants that are diseased or infested with insects, as well as weeds that have spread their seeds. In general, the process of decomposition can take anywhere from one to two years, depending on factors such as the nature of the materials involved and the size of the particles.
Hot or active composting: Composting that is more involved on your end tends to be faster. The composition of the system relies on four essential components: carbon, nitrogen, water, and air.
The carbon-to-nitrogen ratio is maintained at a ratio of 2 to 1. This composting method is classified as aerobic because it relies on microorganisms that require oxygen to break down organic matter.
A well-constructed pile has the potential to generate significant heat, with temperatures exceeding 60°C. It can eliminate any pathogens or weeds that may be in the pile. It’s important to consistently rotate the pile to enhance oxygen circulation and ensure the right amount of moisture.
Composting can be achieved relatively quickly, typically within one to three months, especially during warmer weather.
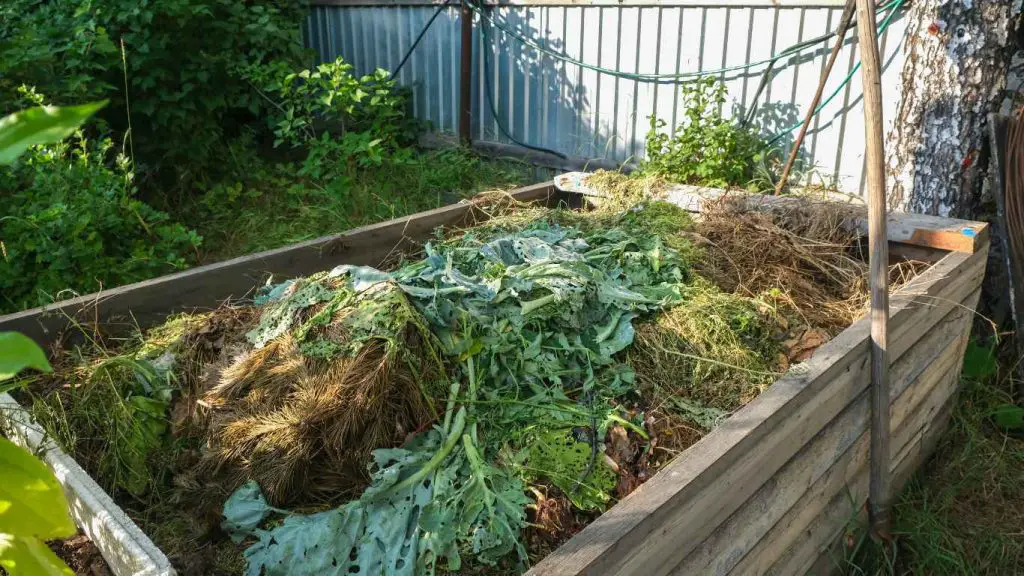
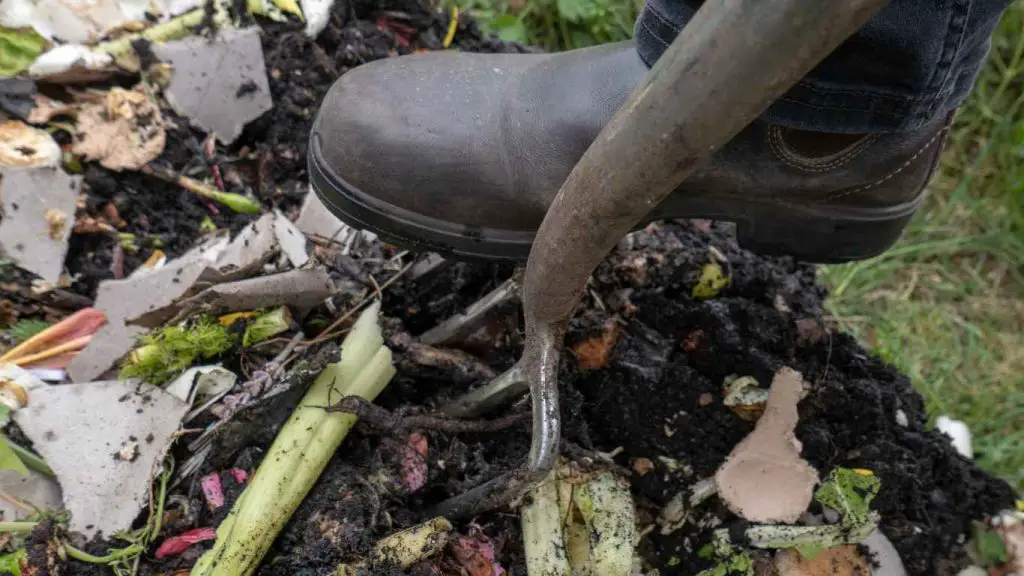
Step Number 4: Creating the Compost Pile
Now is the time to gather all your chopped and shredded materials and start building your compost pile in order to begin making your organic fertilizer. This is the point of magic, where all the components combine to form nutrient-rich goodness for your plants.
Choose a good spot in your backyard or garden to start your compost pile. Choose a location that gets both shade and sunlight during the day. The right amount of light and shade will help keep the decomposition process at the proper temperature.
Select a foundation layer for your compost pile first. This can be made of straw or twigs, which will allow for airflow and keep your pile from getting too dense. Evenly distribute this base layer to lay a strong foundation for the remaining materials.
After that, arrange your shreds and chops on top of the foundation layer. Begin with an even distribution of “brown” and “green” materials. Vegetable scraps, grass clippings, and garden trimmings are examples of green materials; dried leaves, wood chips, and straw are examples of brown materials. To make sure that the nitrogen and carbon in your compost pile are properly balanced, alternate between the two.
Water it just a little bit between each layer to get it as wet as a sponge. This will avoid making a soggy mess while providing the moisture required for the decomposition process. Remember that you want to maintain a damp but not soggy compost pile.
It’s time to cover your compost pile after you have layered your materials and given them a little watering. To shield it from severe rain, which can wash away important nutrients, cover it with a tarp or a layer of straw. Additionally, the covering will aid in the decomposition process by retaining heat and moisture.
Related Articles:
- 15 Simple And Inexpensive Homemade Fertilizers
- How To Make Liquid Fertilizer From Compost For Vegetables?
- 10 Magical And Organic Fertilizers For Your Vegetable Garden
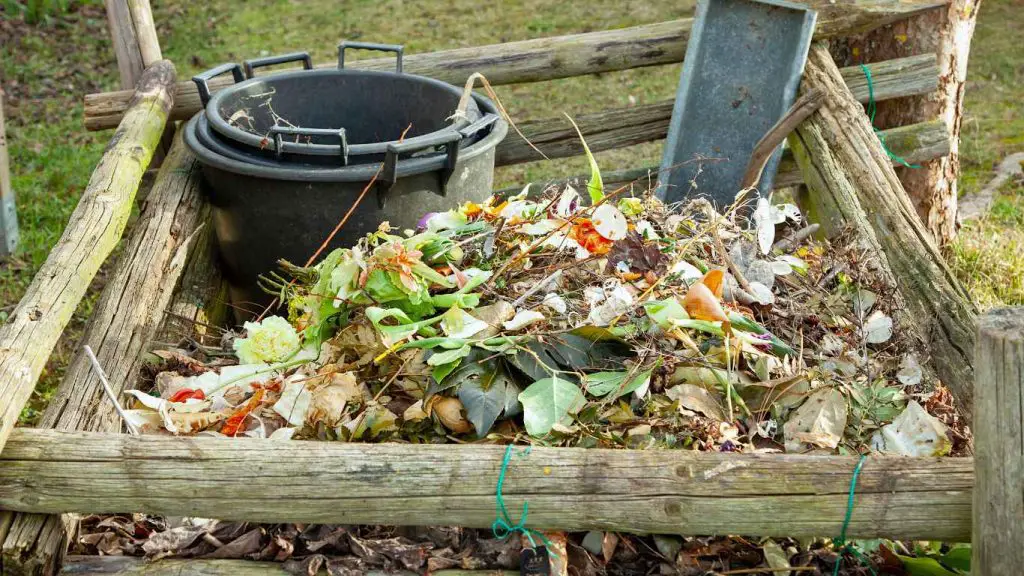
Step Number 5: Maintaining and Turning the Compost
In order to keep your pile in good condition, it is important to ensure that you have the correct amounts of carbon and nitrogen. Additionally, you need to maintain a balance between the three factors that are essential for aerobic composting to take place:
Oxygen: Microbes consume oxygen as they break down waste into compost, so it is important to have proper circulation to ensure a steady supply of oxygen. Adding oxygen to your compost pile is as simple as turning it with a shovel or pitchfork.
Ensuring proper airflow is essential for maximizing evaporation, which in turn affects the moisture level in your pile. It is important to monitor the moisture level to maintain optimal conditions.
Moisture: Moisture is essential for the survival of composting microbes. If the pile becomes too dry, the process will come to a stop. It’s important to ensure that the pile is adequately moistened, but be cautious not to oversaturate it, as excessive water can lead to mold growth and hinder the flow of oxygen. If your compost has a moisture level similar to a damp, wrung-out sponge, then you’re on the right track!
Temperature: The composting process produces heat, and the higher the temperature of the pile, the more quickly the decomposition will happen. A larger volume is desirable for your pile as it allows for better insulation.
To achieve rapid composting, it is recommended to maintain a temperature between 90 and 160 degrees Fahrenheit. This temperature range promotes efficient decomposition without exceeding the upper limit.
High temperatures above 160 degrees can be detrimental to your microbe population, potentially halting the process. Warmer temperatures can lead to increased evaporation, which means that piles that are exposed to higher heat may need to be watered more often.
You should turn the pile up to twice a week in order to maintain the equilibrium of all these factors. By turning the pile, you can mix the material with a shovel or pitchfork so that every part is at least partially exposed to air and eventually reaches the center of the pile, where the temperature is highest.
Water the pile as you turn it over to ensure that all the layers are evenly moistened. Watering a big pile from top to bottom without turning it will not get to the areas that need it most.
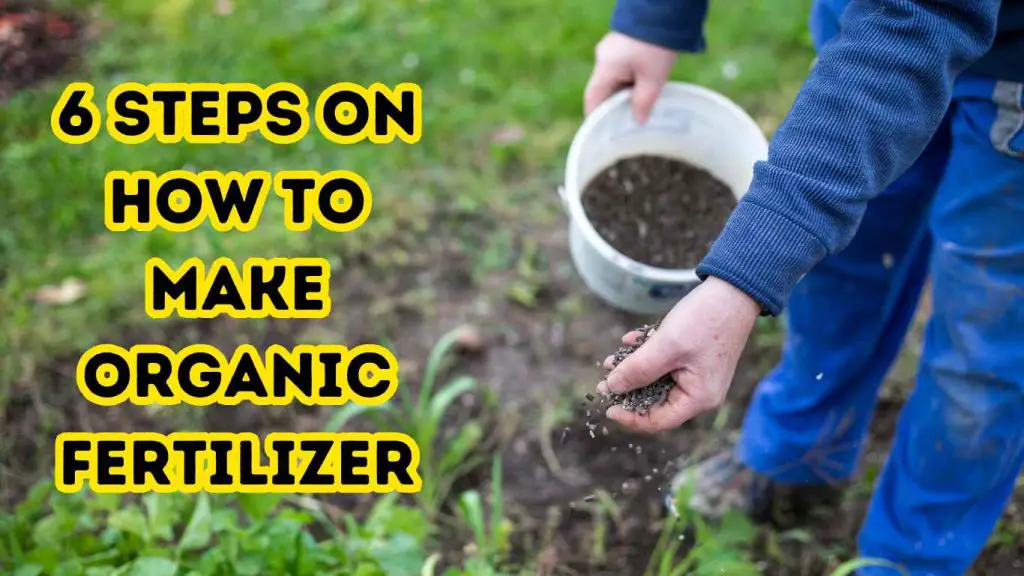
Step Number 6: Applying Your Homemade Organic Fertilizer
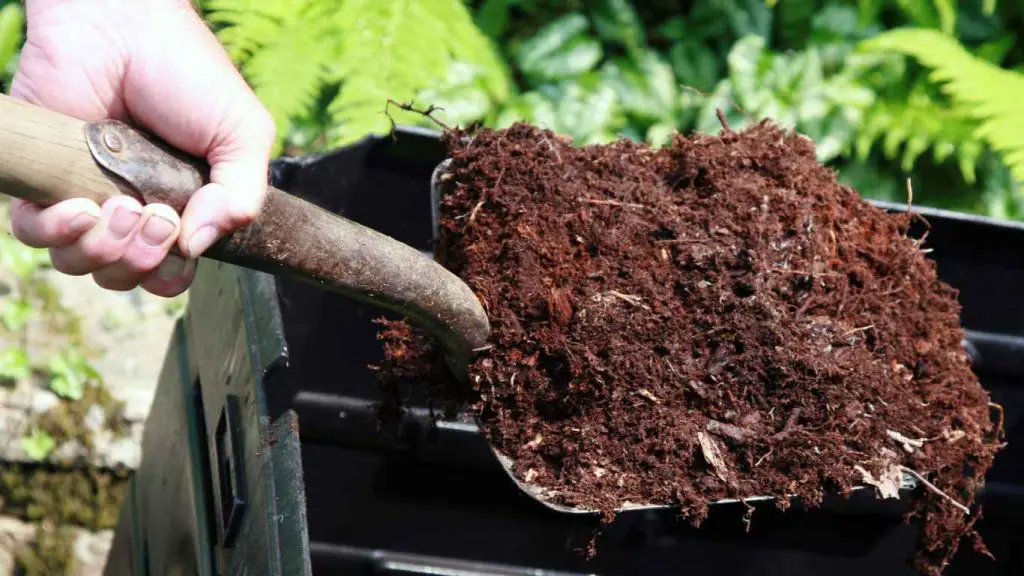
Your compost pile can be turned and maintained on a regular basis to produce an organic fertilizer rich in nutrients that will benefit your plants. When your compost has turned crumbly and dark, and smells earthy and pleasant, it’s time to apply your homemade organic fertilizer.
Applying your homemade organic fertilizer only requires a few easy steps and is a straightforward process. Choose the area or plants that will be fertilized first. It is crucial to have a strategy in place for the location and method of fertilizer application, regardless of the size of your garden bed or collection of potted plants.
Next, take a sturdy shovel or garden fork and your gardening gloves. From your compost pile, take the appropriate amount of compost and distribute it equally around the base of your plants. To prevent any harm, always remember to keep the compost a few inches away from your plants’ trunks or stems.
It could be beneficial to use a rake or hoe to distribute the compost evenly throughout the larger garden bed. By doing this, you can make sure that your plants get the same quantity of the nutrient-rich fertilizer.
Using a garden fork or rake, gently work the compost into the top few inches of soil after it has been applied. This will facilitate the compost’s incorporation into the existing soil, making the nutrients easily accessible to the roots of your plants.
It is crucial to give your plants plenty of water after adding the compost. By doing this, you can ensure that the nutrients in the compost are absorbed by the roots of the plants and help activate them. Make sure to water thoroughly so that the water reaches the root zone by penetrating the soil.
Applying your homemade organic fertilizer in the early spring or fall, when plants are actively growing, is a good practice. These times offer the best circumstances for growth and nutrient absorption.
These instructions will help you apply your homemade organic fertilizer to your plants, giving them a natural, nutrient-rich source of nutrition. The advantages of organic fertilizers and the reasons why many gardeners choose them will be covered in detail in the following section. Watch this space to learn more about the benefits of incorporating organic fertilizers into your gardening techniques.
In conclusion, neither a large budget nor a green thumb are necessary to become an expert at making organic fertilizer. You can discover the key to feeding your plants and encouraging their vibrant growth by carefully adhering to the six steps described in this article. You’ll support a more sustainable and healthful gardening practice in addition to saving money.
Related Articles:
- 15 Simple And Inexpensive Homemade Fertilizers
- How To Make Liquid Fertilizer From Compost For Vegetables?
- 10 Magical And Organic Fertilizers For Your Vegetable Garden
Recent Posts
Mix Baking Soda and Brown Sugar in Your Weed Tea for the Ultimate Anti-Fungus Growth Booster
Growing heavy-feeding vegetables like tomatoes, cucumbers, and peppers requires a massive amount of soil energy. These plants grow fast, produce heavy fruits, and constantly pull raw nutrients out of...
The Most Unusual Way to Grow Tomatoes That Actually Works: Eggs, Compost, and the Deep Burial Method
The pursuit of the perfect tomato is a journey every gardener embarks upon, often leading to years of trial, error, and experimentation. To achieve a harvest that is truly abundant, one must look...
