
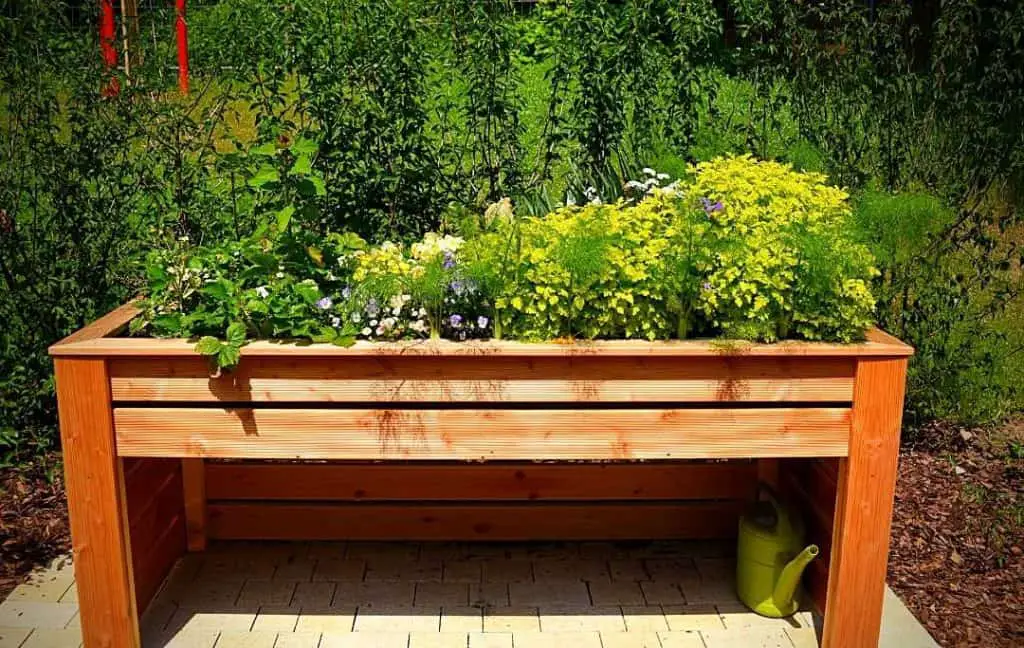
A high raised planter box is a good option as it has many benefits as compared to in-ground beds. You can buy an elevated bed from any garden store or online but the best and cheap way to build it home.
In this article, we are going to explain all the steps of building a simple and unique elevated planter box. This project will take only a few hours of your weekend.
You should gather all the materials which you need for making a raised bed with legs. The important material without it you can’t build is wood. But there are different options of wood available. First, we will discuss the types of wood best for building raised beds. Birth
TYPES OF WOOD WHICH IS BEST FOR RAISED GARDEN BED
There are many options for you of wood, your option depends on your budget. Now we will discuss all the types of wood so you can decide which type of wood suits you.
1- CEDAR
Cedarwood has a beautiful, smooth, and elegant appearance. It can last up to 20 years. The best thing about cedar is that it is chemical-free which is good for your plants. Try to buy FSC Certified only.
2- JUNIPER
It is chemical-free and durable. It can last up to 50 years. It is cheaper than the cedarwood. It has a rustic look that’s why most of the gardeners prefer cedar.
3- PRESSURE TREATED
The life span of this wood is up to 20 years. It is inexpensive and easy to find. The worst thing about this wood is that it contains chemicals that are not good for your plants.
The preservatives in this wood make it long-lasting but it can damage your soil which is not good for your plant’s health. Chemicals from the wood migrate to the soil and then easily enter into the food which you are growing in the soil.
4- RECLAIMED WOOD
This wood gives a rustic and charming look. But on the other hand, it contains chemical additives such as lead paint. These additives and preservatives are dangerous for your edible plants. Unhealthy plants are not good for you. It is inexpensive but not durable.
5- REDWOOD
It has a beautiful color and elegant style. Its lifespan is about 20 plus years. It is chemical-free but it is very expensive. You should buy FSC Certified redwood only.
Read More; How to Build Tall Raised Garden Beds?
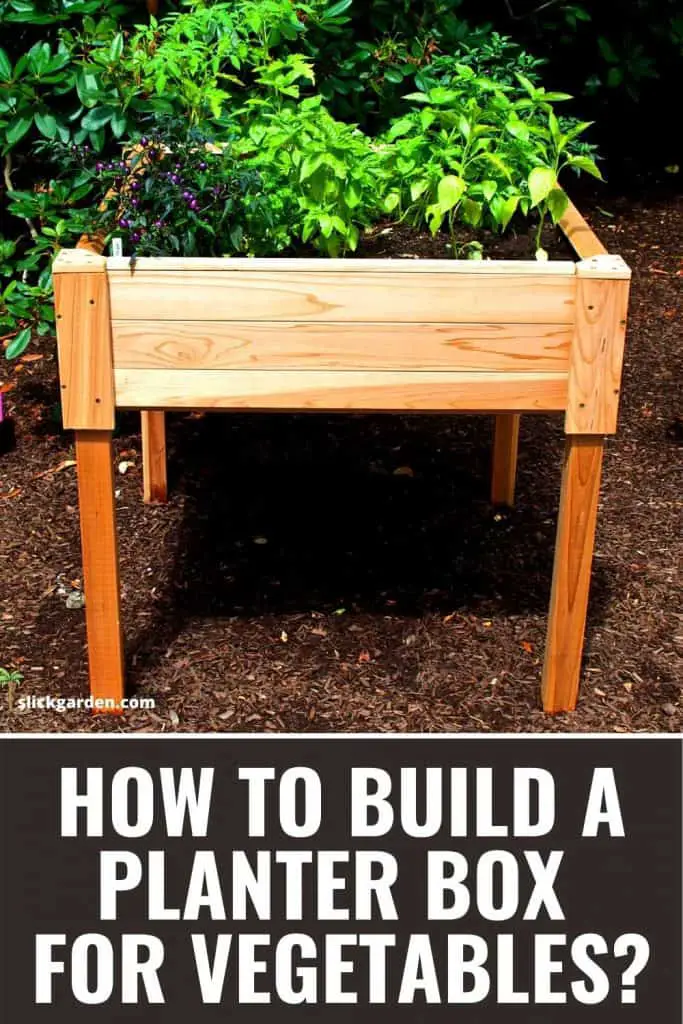
HOW TO BUILD A PLANTER BOX FOR VEGETABLES WITH LEGS?
After deciding the type of wood, the next step is gathering all the necessary tools and things. We are going to use cedarwood for our project, you can use another type of wood but our recommendation is cedar. Because it is long-lasting. The materials you needed for accomplishing your project are as follows.
MATERIALS
- Four 1 × 6 @ 8ft cedar
- Three 1 × 4 @ 8ft cedar
- Two 1 × 2 @ 8ft cedar
- 1 ¼ inches self-tapping deck screws
- 1 ¼ inch Brad’s nails
- Wood Glue
- Weed barrier
TOOLS
The final dimension of this planter is
- 30 ¾ inches tall
- 18 inches wide
- 8 ¼ inches deep
PROCEDURE
All the steps of building your elevated raised bed are as follows. For the best result, follow all the steps and you will get the best-finished product. It is not difficult to build a planter box at home but as you are not a skilled person so be careful in using all the tools.
1- MAKE INITIAL LUMBER CUTS
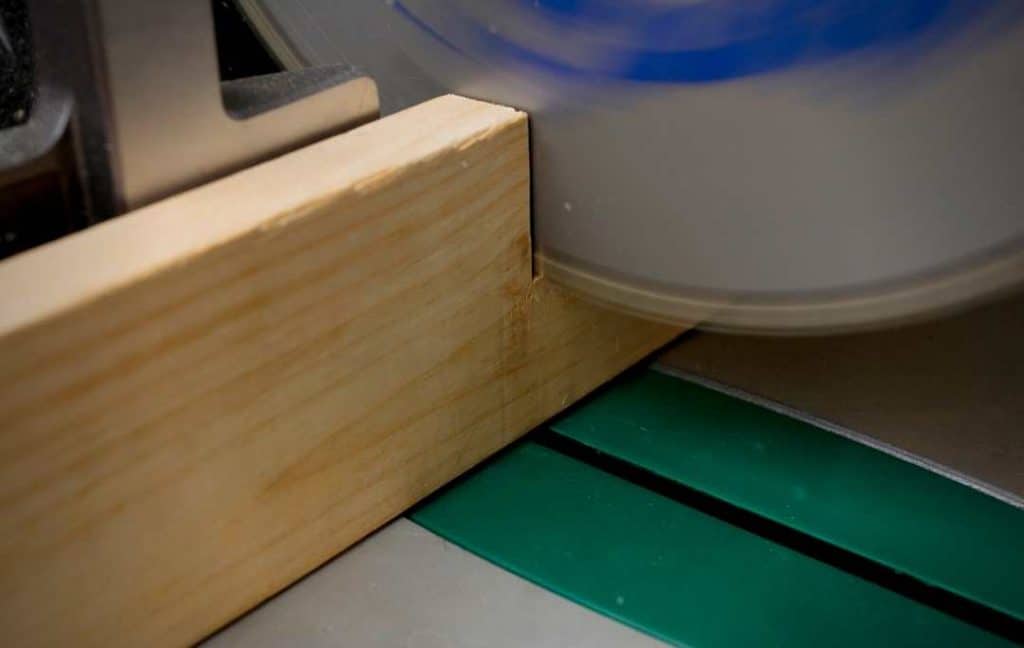
Miter saw will help you to cut the lumber of 1×6 cedarwood. The following cuts should be made
- 4 pieces @ 36 inches
- 4 pieces @ 16 ½ inches
The more cuts you need from 1×4 cedarwood
- 8 pieces @ 30 inches
The cuts you need from 1×2s are
- Two pieces @ 34 ¼ inches
2- ATTACH THE 1×2 BOARDS TO THE BOTTOM OF TWO 1×6s TO CREATE A LEDGE
After making the cuts, now we start attaching boards. First, attach one of the 34 ½ inches 1 X 2 boards to the bottom edge of one of the 36 inches boards. You need 1 ¼ inch self-tapping deck screws for attaching the boards.
The maximum number of screws is 6 to give maximum support to your boards. Again do the same step on one of the other 36″ 1×6 boards.
3- ASSEMBLE RAISED PLANTER BOXES
Now start marking, first mark ⅜” in from both edges of the 16 ½” 1×6 boards. With the help of the drill make holes on each of those marks. There is no need for Pre-drilling for self-tapping screws but we make pilot holes because in this way we will get precise and straight holes that’s why drilling through the edges of boards is recommended.
One end of the 16 ½” 1×6 board attaches to the end of the 36″ board with a 1×2 ledge. You need 1 ¼ inch screws and a drill. Use the drill very gently because cedar wood is very soft so you should be careful so your wood is not split.
Now again do the same step on the opposite side using the other 36″ 1×6 boards with a ledge. The 1×2 ledges should be on the bottom side of the raised bed.
Now repeat the same step and build another planter box but there is no need for 1×2 ledges. Now your frame is ready for your elevated planter box.
NOTE
You need a drill and nailer to join these boxes easily.
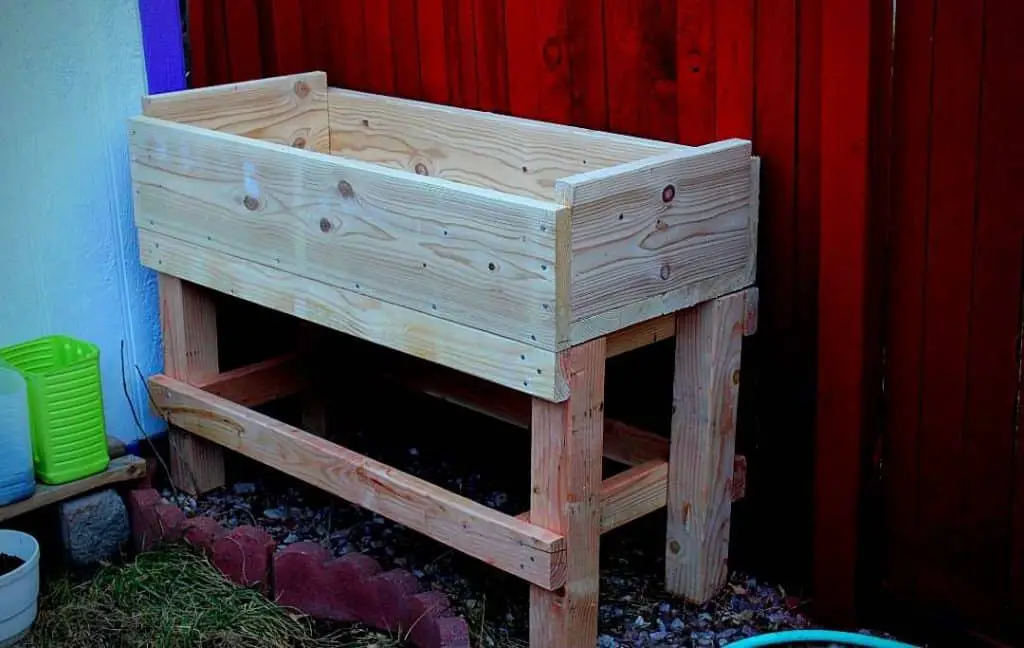
4- ATTACH WOOD LEGS TO PLANTER BOX
Now the time comes to attach legs to your raised bed. Start attaching 30″ 1×4 pieces to another 30″ 1×4 board with wood glue and 1 ¼” brand nails. In this way, you will create the legs of the bed. To build, three more legs repeat the same process.
At this stage attach the top planter box without the ledges to the top of the legs. The screw will help to complete this joining process. 2-3 deck screws are enough for attaching each leg to the planter box.
Now stack the bottom planter box under the top planter box. You need screws to attach legs to the bottom. Make it possible that the ledge side should be on the bottom of the planter box. In the same way, attach the remaining two legs with the planter box.
5- ADD BOTTOM WOOD SLATS AND TOP TRIM TO DIY RAISED PLANTER BOX ON LEGS
Now the time comes to add the bottom of the planter box. For this purpose, first, you should measure the inside width of your planter box after that cut six pieces of wood.
You need to cut 1×6s to the size less ¼ “. Now lay these six boards on the top of the 1×2 ledge. The space between two boards should be ¾” for creating the bottom. One or two brad nails are enough to secure each board in place.
Your top of the planter box will be finished after attaching 1×2 boards. Cut the boards to size to trim out the top edges of the top of the planter box.
Read More; Self Watering System for your Raised Beds
6- PREPARE DIY RAISED GARDEN BED WITH LEGS
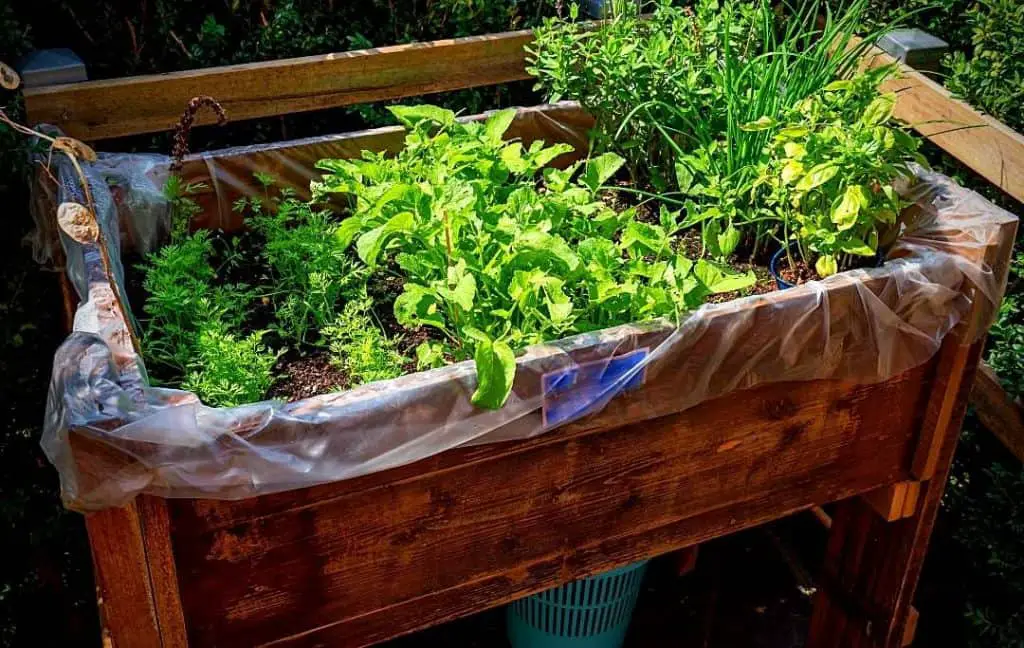
Landscape fabric is the best option it will help to prevent the dirt which comes out of the slats. The best thing about landscape fabric is that it has small holes which are good for drainage.
The second option is plastic but makes sure before using it, make some holes with the help of a drill inside the plastic. Drainage is very important for the growth of healthy plants. After that, your raised bed is ready for filling soil.
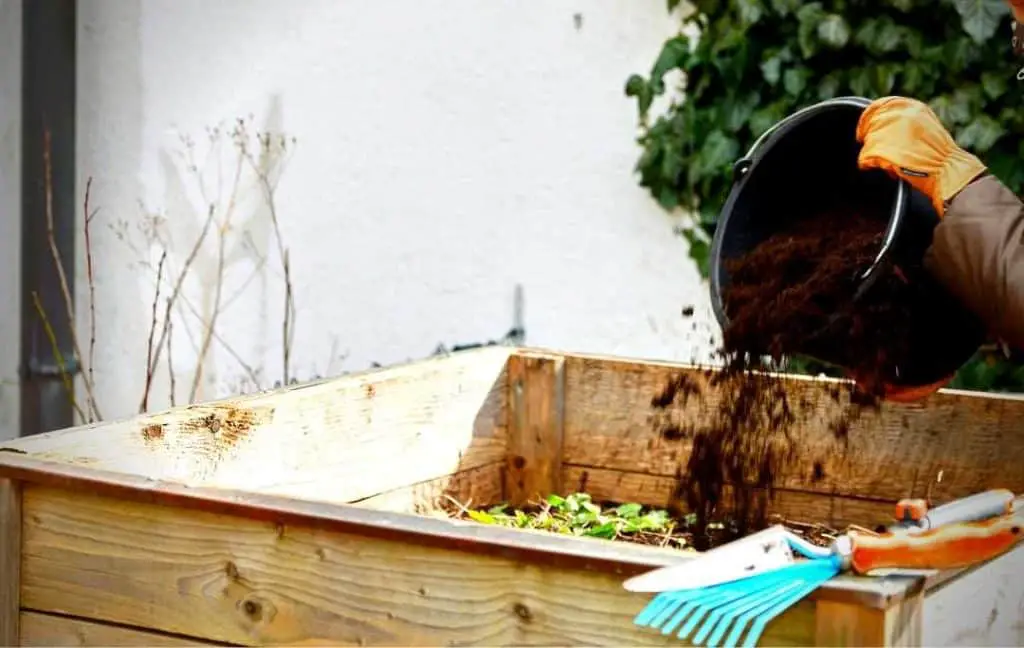
Make sure your soil should be of high quality. Compost will make it possible that your plants will get all the major nutrients. With the addition of organic matter, it will become easy for your plants to make their food. You can grow any type of plant in it but it is best for growing edible plants.
Read More; How To Make Compost At Home Using Kitchen And Garden Wastes
If you are facing the problem of limited space, then you should build this raised. First, it is a very low cost because you are building it at home and secondly, you can place it anywhere at your home for example balcony patio or deck.
If you will build two or three more raised beds of such type then you can create a kitchen garden. It means you will get a fresh supply of vegetables and herbs from your kitchen garden.
You can easily grow plants such as lavender, basil, red pepper, rosemary, mint parsley, marigold, and mint in this planter box.
Read More; 28 BEST VEGETABLES TO GROW IN RAISED BEDS
I hope this article will guide you and you will easily build the planter box at home. If you buy it from it will cost you too much. By building this planter at home you not only save your money but at the same time, you will enjoy this project.
Recent Posts
Watering a garden may seem like a simple task, but doing it efficiently can make a big difference in plant health and water usage. Many gardeners spend money on sprinklers, irrigation systems, and...
I Mixed Dish Soap, Vinegar & Oil and Sprayed My Plants… The Results Shocked Me
Many home gardeners look for simple and affordable ways to keep their plants healthy without relying on strong chemical pesticides. One popular method is a homemade plant spray made from everyday...