
Constructing a raised bed using cinder blocks offers a straightforward and attractive method to establish a garden area that not only enhances the visual appeal of your outdoor space but also offers various advantages for your plants.
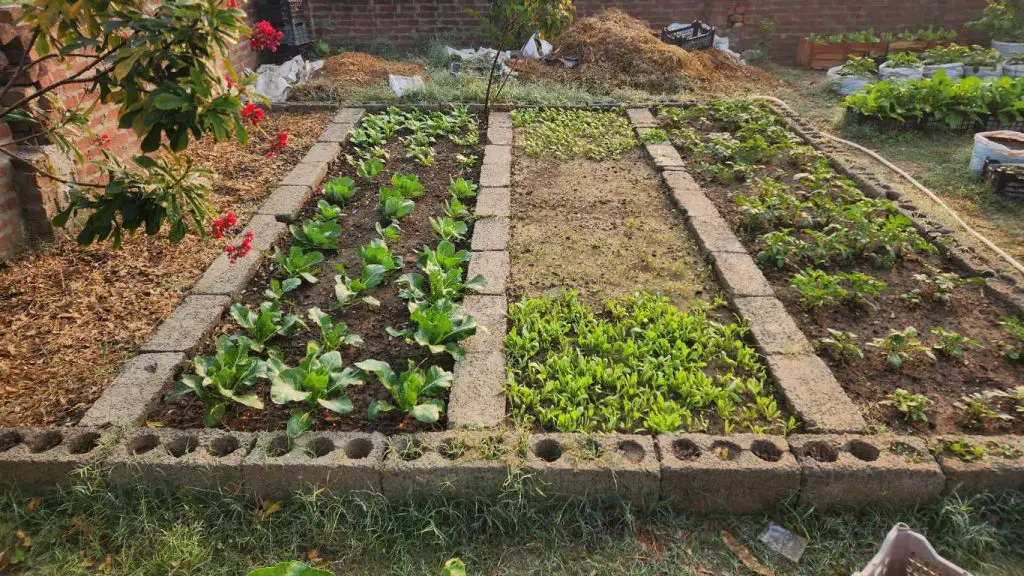
For both experienced gardeners and beginners, building a raised bed with cinder blocks provides a long-lasting and flexible solution. It allows you to easily customize the dimensions and layout of your garden.
Follow this guide to easily create a raised bed using cinder blocks. This will give you a strong base for your garden, allowing you to grow plants in an organized and successful manner.
Join us in this exciting DIY gardening project and create a beautiful raised bed that will enhance your outdoor space.
Watch the video if you don’t like to read
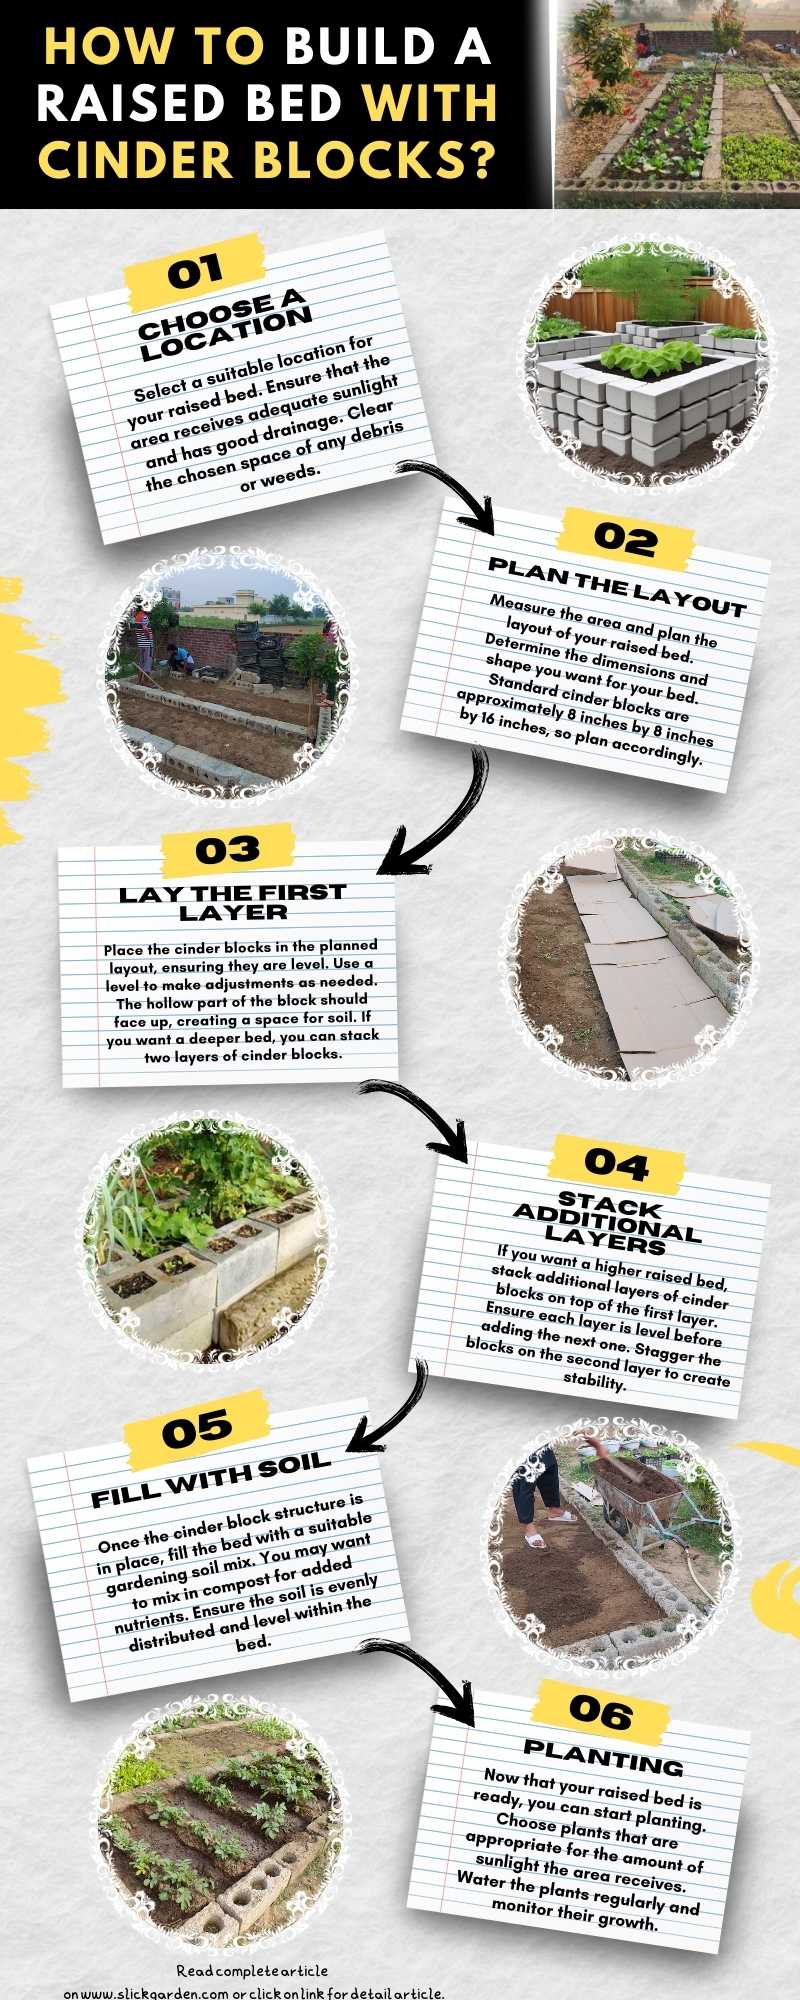
Step 1. Choose The Location.
The best location for your cinder block raised bed will depend on a few factors, including:
Sunlight: Many vegetables require a minimum of 6 hours of direct sunlight each day. It’s important to select a location that receives ample sunlight, particularly during the morning hours.
Drainage: Ensuring proper drainage is crucial in order to avoid root rot. Steer clear of areas that are prone to flooding or have inadequate drainage. If you need to place your bed in an area with poor drainage, you have the option to create a drainage layer using gravel or crushed stone at the bottom of the bed.
Accessibility: It is important to have convenient access to your bed for tasks such as watering, weeding, and harvesting. Ensure that there is ample room surrounding the bed to allow for comfortable movement.
Wind: Severe winds have the potential to cause harm to your plants and displace soil. If you reside in a location with strong winds, it is advisable to select a protected area for your bed.
Convenience: It would be best if your raised bed is located near a water source for convenience. By implementing this method, you will find it much more convenient to ensure that your plants remain properly hydrated.
Step 2. Clean Your Location From Weeds, And Level The Soil.
Undesirable plants can hinder the growth of your desired plants by fighting for essential resources such as sunlight, water, and nutrients. Not taking care of them properly can hurt the growth and well-being of your plants.
Make sure to thoroughly dig out larger weeds or clumps, ensuring you remove as much of the root as possible for effective removal.
This power tool is designed to effortlessly churn the soil, effectively cutting up and disrupting weed roots. It’s quicker than using a shovel, but it may have a greater impact on the soil structure.
A level ground is crucial for proper drainage and the construction of a sturdy raised bed frame. Move soil from higher areas to fill in dips and depressions using a shovel. Strive for a seamless, level surface throughout the desired bed space.
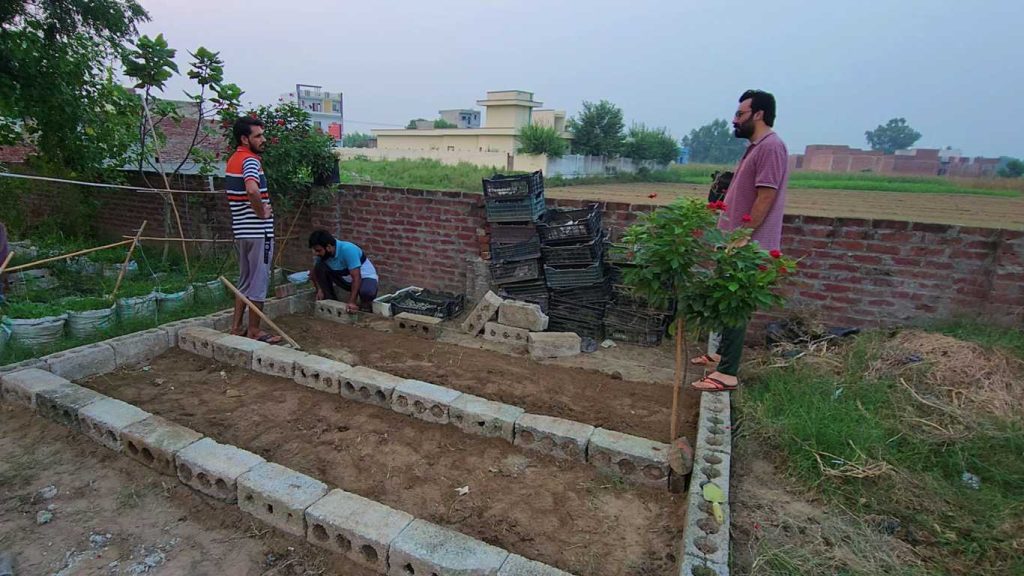
Step 3. Line Your Cinder Blocks.
Layout Planning: Prior to starting, it’s important to carefully consider the layout of your raised bed. Choose the dimensions and shape that best suit your needs. Make sure the selected spot gets enough sunlight for the plants you plan to cultivate.
Placement of Cinder Blocks: Begin by arranging the cinder blocks in the preferred configuration on the surface. Cinder blocks are usually rectangular concrete blocks that have two openings. Organize them in a manner that creates the boundary of your elevated garden.
Alignment and Leveling: Make sure the cinder blocks are properly aligned based on your intended layout. Ensure that the blocks are level and evenly aligned by using a level to check for any tilting. Ensuring the stability and appearance of the raised bed is crucial.
Step 4. Add Cardboard And Then Dry Leaves Or Twigs Or Decomposing Wood.
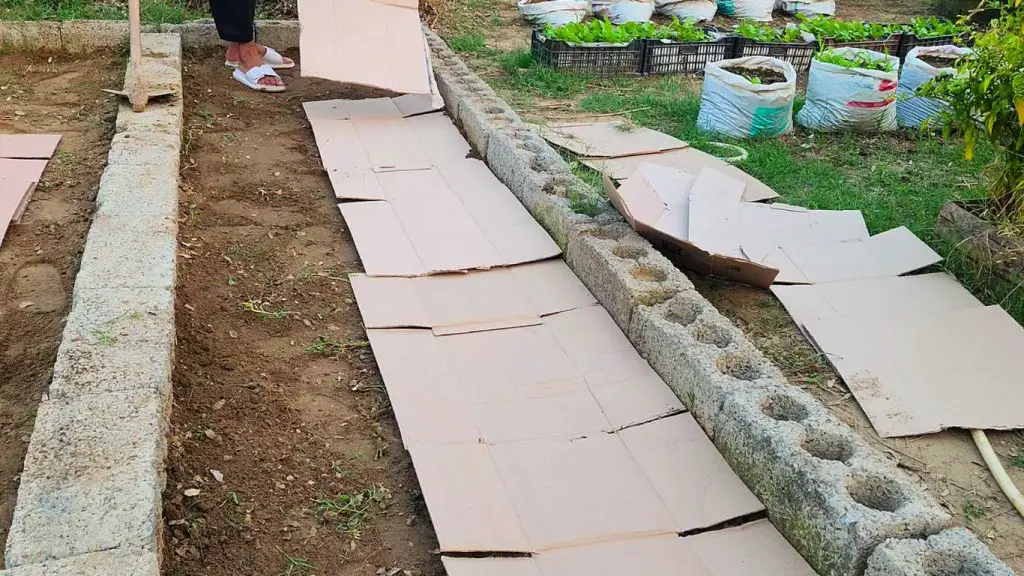
Lay down cardboard or several layers of newspaper at the bottom of the bed:
This acts as a protective barrier that prevents the growth of unwanted weeds and grass in your garden bed. Blocking sunlight with materials like cardboard or newspaper can prevent the growth of unwanted plants underneath.
Overlap the edges to prevent weeds from coming through:
To create a more effective weed barrier, it’s important to make sure that the cardboard or newspaper layers overlap at the edges. By following this method, the likelihood of weeds finding gaps and sprouting is significantly reduced.
Add a layer of mulch (dry leaves, twigs, or small pieces of decomposing wood) on top of the cardboard or newspaper:
Mulch serves as a protective layer that is spread on the surface of the soil. Here, it is made up of dry leaves, twigs, or small decomposing wood pieces.
Step 5. Add The Best Garden Soil And Then Compost On Top.
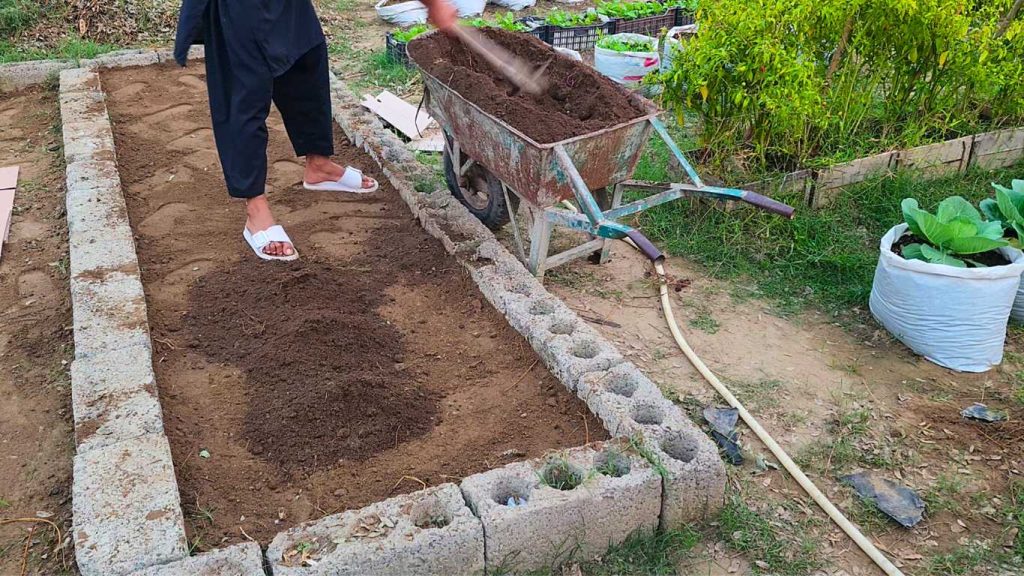
Start filling the bed with garden soil. You can easily find garden soil at a nearby nursery or garden center. Seek out soil that has a high concentration of organic matter and drains well. Make sure to fill the bed up to approximately 75% of its capacity.
Add a layer of compost. Using compost can be a beneficial method to enhance the quality of your soil and promote better drainage. You have the option to buy compost from a nearby nursery or garden center, or you can choose to create your own. Apply a layer of compost that is approximately 2-3 inches in thickness.
Related Articles:
- Everything You Need To Know About Adding Worms In Your Raised Bed Garden
- Every Thing About Watering Your Plants In A Raised Bed Garden
- How Many Tomato Plants In A 4×4 Raised Bed?
Step 6. Plant Your Seeds Or Seedlings.
Now, all that’s left to do is to place your seeds or seedlings into your raised bed. Make sure to carefully follow the instructions provided on the seed packet or plant tag regarding the appropriate planting depth and spacing.
I hope my explanation was clear and useful. Please let me know if you need any further clarification.
Recent Posts
Stop Buying Expensive Planters! Do This With Old Plastic Tanks Instead
Old, broken plastic water tanks are a common sight in many rural areas, farms, and suburban backyards. Most of the time, these large containers are viewed as useless plastic waste that takes up...
Don’t Throw Away That Old Water Tank Until You See This Genius Raised Bed Idea for Your Garden
In many backyards, there are items that slowly lose their purpose and end up taking space for no reason. An old broken water tank is one of those things. Instead of throwing it away or letting it sit...