
You hold seed packets and dream of growing tasty vegetables. Turning that vision into a reality is a breeze.
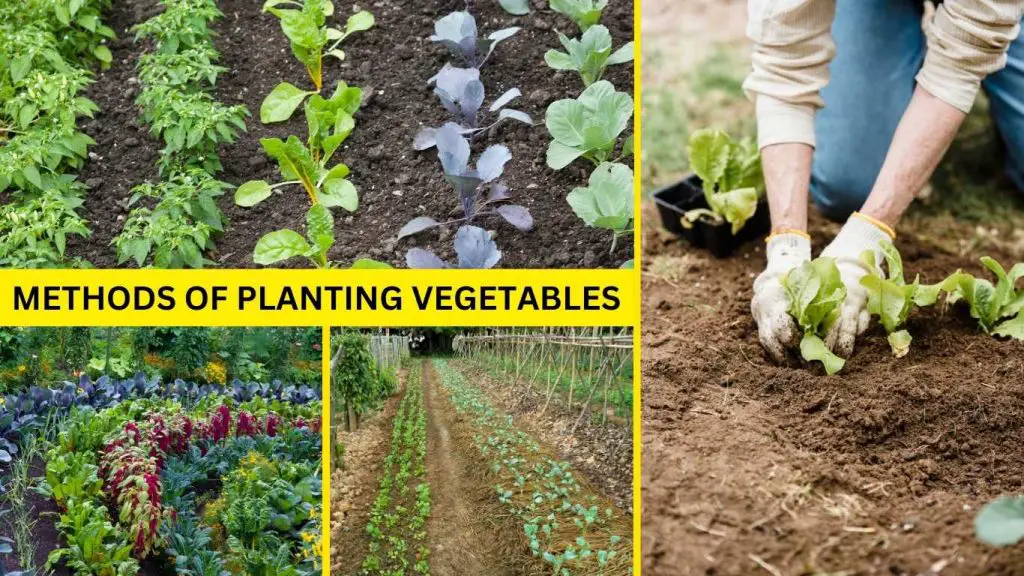
By making a few choices about the vegetables, planting quantities, and methods of growing, you can easily embark on a journey towards savoring a delectable feast that will nourish not only you and your family but also your neighbors. Discover the basics of vegetable planting methods with the following steps.
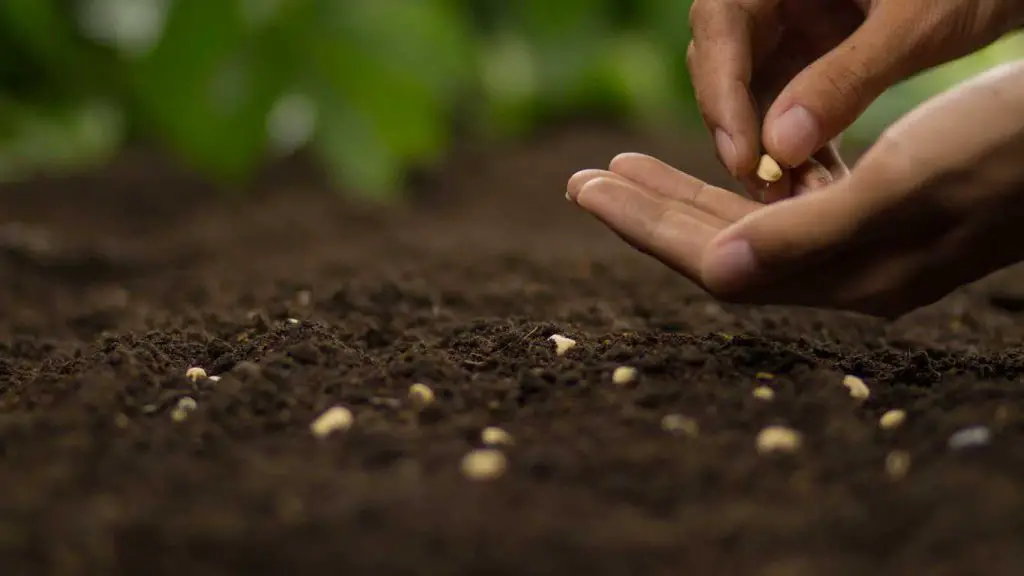
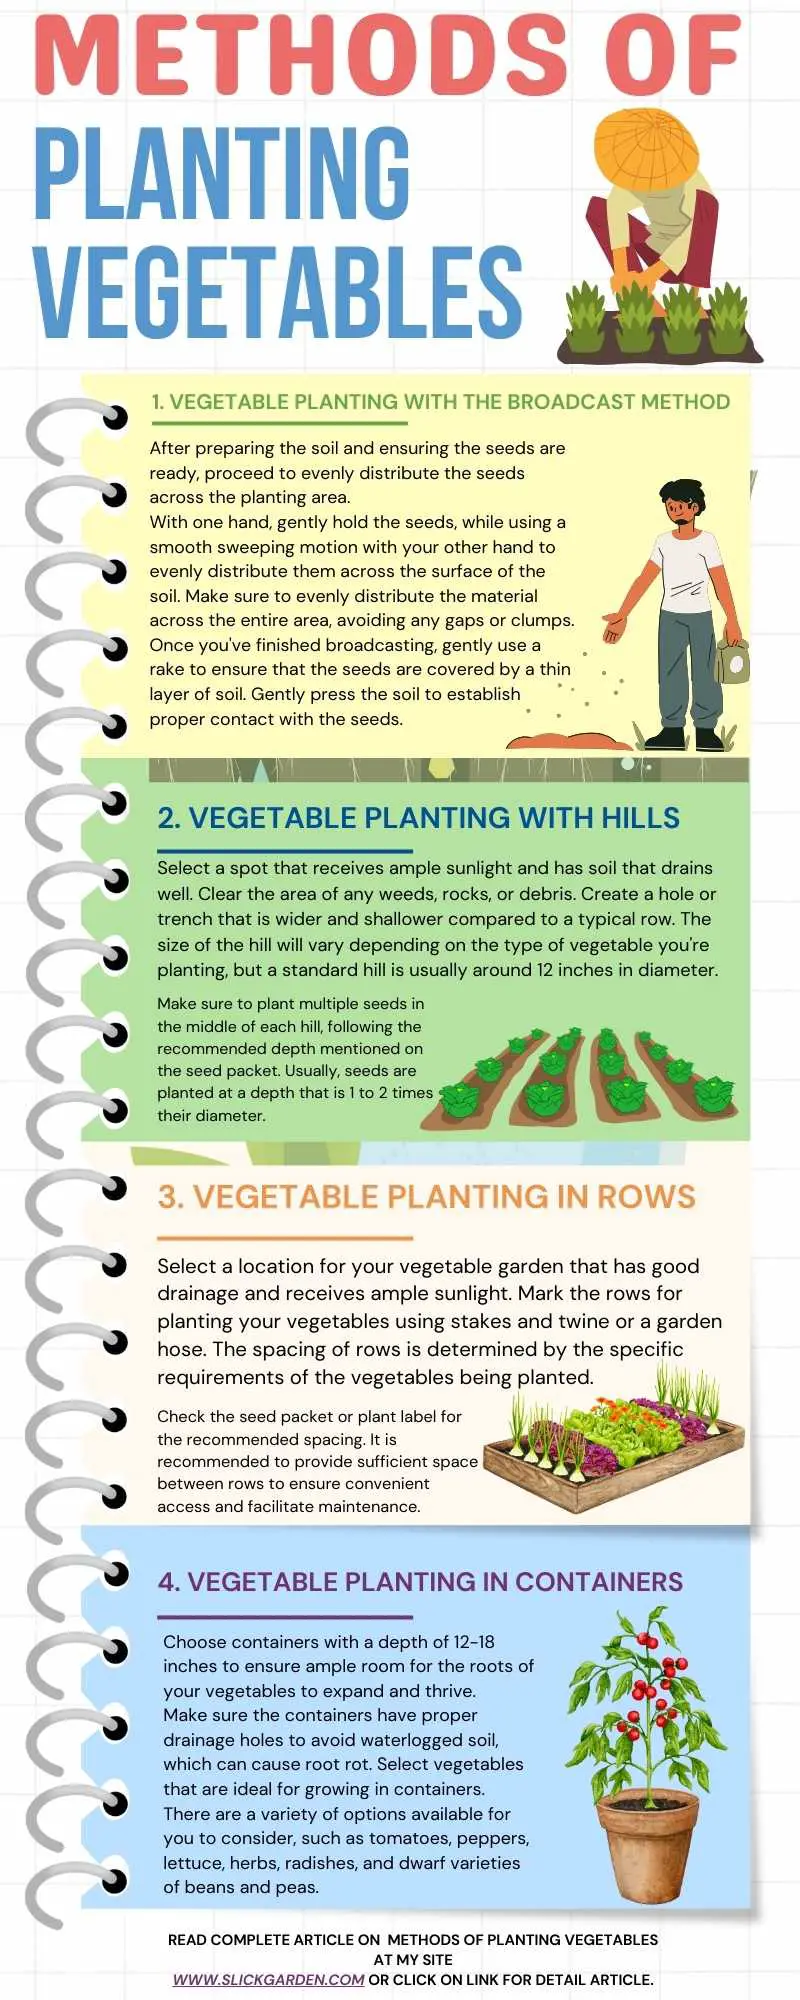
1. Vegetable Planting with the Broadcast Method
Planting vegetables using the broadcast method is a straightforward way to distribute seeds across a specific area. This technique is often employed for crops that don’t need to be spaced precisely. Let me provide you with a straightforward guide consisting of three steps:
Prepare the Soil:
- Begin by getting the soil ready in the designated planting area. Clear away any debris, weeds, or rocks.
- Utilize a rake or hoe to effortlessly break up clumps and establish a surface that is smooth and level. By following this method, you can guarantee consistent seed coverage.
- Enhance the soil by incorporating organic matter or compost to supply essential nutrients for the developing plants.
Select and Prepare Seeds:
- Select vegetable seeds that are appropriate for broadcasting during planting. Leafy greens, certain herbs, and some root vegetables can work well with this method.
- Refer to the seed packet for guidance on how deep to plant the seeds and how far apart they should be spaced. When it comes to broadcast planting, it’s important to have a basic understanding of spacing to prevent overcrowding.
- To ensure even distribution when broadcasting, consider mixing small seeds with a carrier material such as sand or vermiculite.
Broadcast Planting:
- After preparing the soil and ensuring the seeds are ready, proceed to evenly distribute the seeds across the planting area.
- With one hand, gently hold the seeds, while using a smooth sweeping motion with your other hand to evenly distribute them across the surface of the soil. Make sure to evenly distribute the material across the entire area, avoiding any gaps or clumps.
- Once you’ve finished broadcasting, gently use a rake to ensure that the seeds are covered by a thin layer of soil. Gently press the soil to establish proper contact with the seeds.
Keep in mind that certain crops may benefit from a light soil covering, while others may need direct contact with the soil surface. Make sure to always consult the specific guidelines for the vegetables you are planting.
2. Vegetable Planting with Hills
Planting vegetables in hills is a popular gardening method that can be advantageous for specific crops like squash, melons, and cucumbers. Hills offer improved drainage and can accelerate soil warming. Here are two easy steps to follow when planting vegetables in hills:
Prepare the Soil:
- Select a spot that receives ample sunlight and has soil that drains well. Clear the area of any weeds, rocks, or debris.
- Create a hole or trench that is wider and shallower compared to a typical row. The size of the hill will vary depending on the type of vegetable you’re planting, but a standard hill is usually around 12 inches in diameter.
- If you have soil that tends to hold onto water, you might want to think about incorporating some organic matter, such as compost, to help enhance drainage.
- Mix in any recommended fertilizers or amendments based on the needs of the specific vegetable you’re planting.
Plant the Seeds or Transplants:
- When it comes to planting seeds, it’s best to keep things straightforward. Make sure to plant multiple seeds in the middle of each hill, following the recommended depth mentioned on the seed packet. Usually, seeds are planted at a depth that is 1 to 2 times their diameter. Ensure that the seeds are spaced appropriately based on the recommended spacing for the specific vegetable.
- When it comes to transplants, it’s best to keep things straightforward. Just make sure to place one or a few plants in the center of each hill. Make sure the planting depth matches that of the containers.
- Make sure to thoroughly water the hills after planting in order to help the soil settle around the seeds or transplants.
- Adding mulch around the hills can be beneficial as it helps to retain moisture, suppress weeds, and regulate soil temperature.
Note: The size and spacing of the hills, along with the depth of planting, will differ based on the specific vegetable you are growing. It’s important to always consult the planting instructions that are specific to the crop you’re working with. Furthermore, it’s important to take into account the general arrangement of your garden and ensure that there is enough distance between hills to facilitate healthy growth and proper airflow.
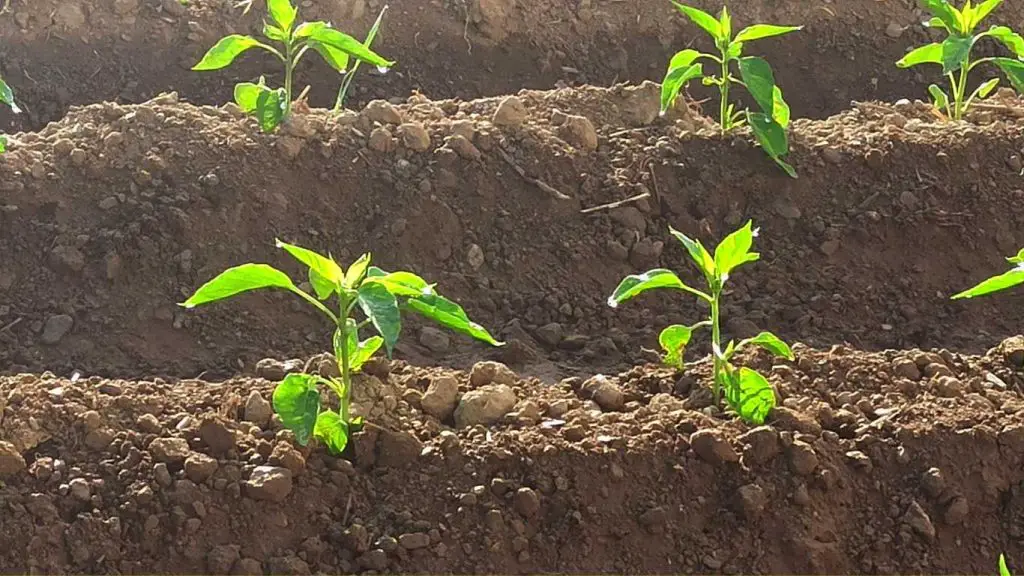
3. Vegetable Planting in Rows
Gardening in rows is a popular and practical way to plant vegetables, allowing for a neat and efficient use of space. Let me provide you with a straightforward set of instructions to help you navigate through the process:
Prepare the Soil:
- Select a location for your vegetable garden that has good drainage and receives ample sunlight.
- Ensure that the area is free from any unwanted vegetation, stones, or other clutter.
- Loosen the soil to a depth of about 6-8 inches using a garden fork or tiller. This enhances soil aeration and drainage.
- Enhance the soil’s nutrient content by incorporating organic matter like compost or well-rotted manure.
Mark and Space the Rows:
- Mark the rows for planting your vegetables using stakes and twine or a garden hose. The spacing of rows is determined by the specific requirements of the vegetables being planted. Check the seed packet or plant label for the recommended spacing.
- It is recommended to provide sufficient space between rows to ensure convenient access and facilitate maintenance. A typical spacing for rows is usually between 18 inches to 2 feet.
- Make sure to use a measuring tape to maintain a consistent distance between rows. This assists in streamlining and maximizing the existing space.
Planting the Vegetables:
- Create shallow trenches along the marked rows using a hoe or a hand trowel. The trench’s depth will vary based on the size of the seeds or seedlings you plan to plant.
- Place the seeds or seedlings into the trenches, following the spacing guidelines provided on the seed packet or plant label.
- Make sure to cover the seeds or roots with soil and gently pat it down to ensure proper seed-to-soil contact.
- Make sure to thoroughly water the newly planted rows so that the soil can settle around the seeds or roots.
Keep Reading:
- How To Start Raised Bed Vegetable Gardening For Beginners?
- The Best Plants For Vegetable Garden; Must Grow Plants
- Are Worms Good For The Vegetable Garden?
4. Vegetable Planting In Containers
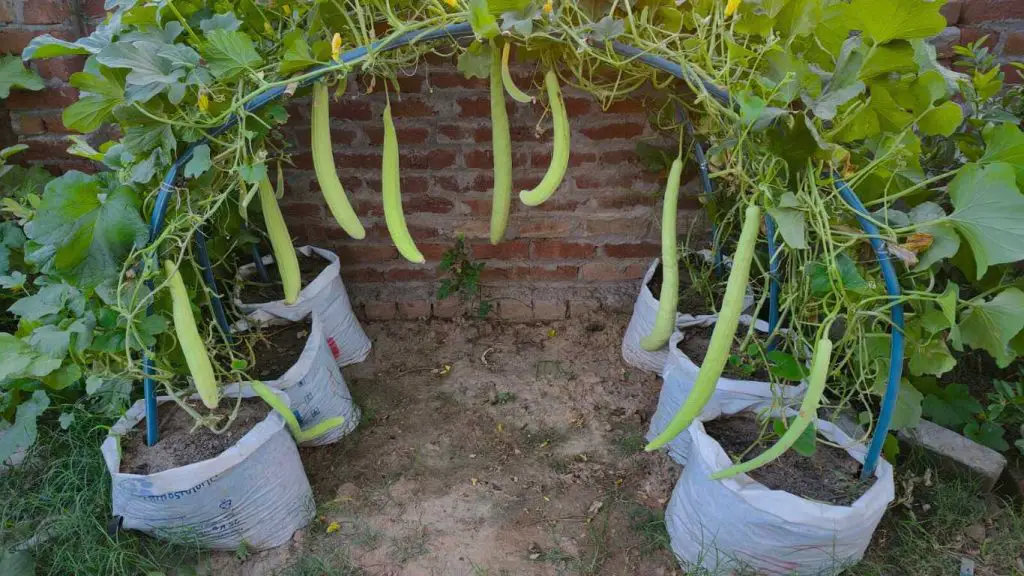
Growing vegetables in containers offers a convenient and efficient solution for cultivating your own produce, particularly when faced with limited garden space. Here are three easy steps to follow when planting vegetables in containers:
Choose the Right Container:
- Choose containers with a depth of 12-18 inches to ensure ample room for the roots of your vegetables to expand and thrive.
- Make sure the containers have proper drainage holes to avoid waterlogged soil, which can cause root rot.
- Opt for containers crafted from materials such as plastic, ceramic, or wood. Ensure that they are thoroughly cleaned and sanitized prior to use.
Select Suitable Vegetables:
- Select vegetables that are ideal for growing in containers. There are a variety of options available for you to consider, such as tomatoes, peppers, lettuce, herbs, radishes, and dwarf varieties of beans and peas.
- Take into account the final size of the plant when selecting your vegetables. Choosing smaller, more compact varieties is often recommended for container gardening.
Planting Process:
- Opt for a top-notch potting mix that has excellent drainage and is enriched with organic matter. It is recommended to avoid using garden soil in containers, as it can become compacted and impede the growth of roots.
- To enhance drainage, it’s recommended to add a layer of small stones or fragments of terracotta pots at the base of the container.
- Ensure that you plant the selected vegetables based on their individual needs. Make sure to adhere to the suggested spacing indicated on the seed packet or plant tag.
- Ensure that the plants are watered adequately after planting and maintain consistently moist soil, without overwatering.
- Adding a layer of mulch on top of the soil can be beneficial in retaining moisture and regulating temperature.
Recent Posts
The Secret Homemade Liquid Fertilizer That Can Boost Flowering, Fruiting, and Plant Growth Naturally
Many of the materials we throw away in the kitchen still contain nutrients that can be useful in the garden. Onion peels and potato peels are good examples. Instead of sending them to the trash, you...
I Mixed Yogurt, Molasses & Compost Tea for 24 Hours… The Results Changed My Garden Soil
Healthy soil is much more than a mixture of sand, silt, clay, and organic matter. It is a living ecosystem filled with bacteria, fungi, protozoa, nematodes, and many other microscopic organisms....