
Homemade gardening provides a fulfilling pastime and customized outdoor area. It is inexpensive and only needs simple materials and tools. Repurposed materials can be used to make lovely, useful garden accents. This article promotes creativity and sustainability by looking at 15 simple, low-cost DIY garden ideas.
Repurposed Container Gardens
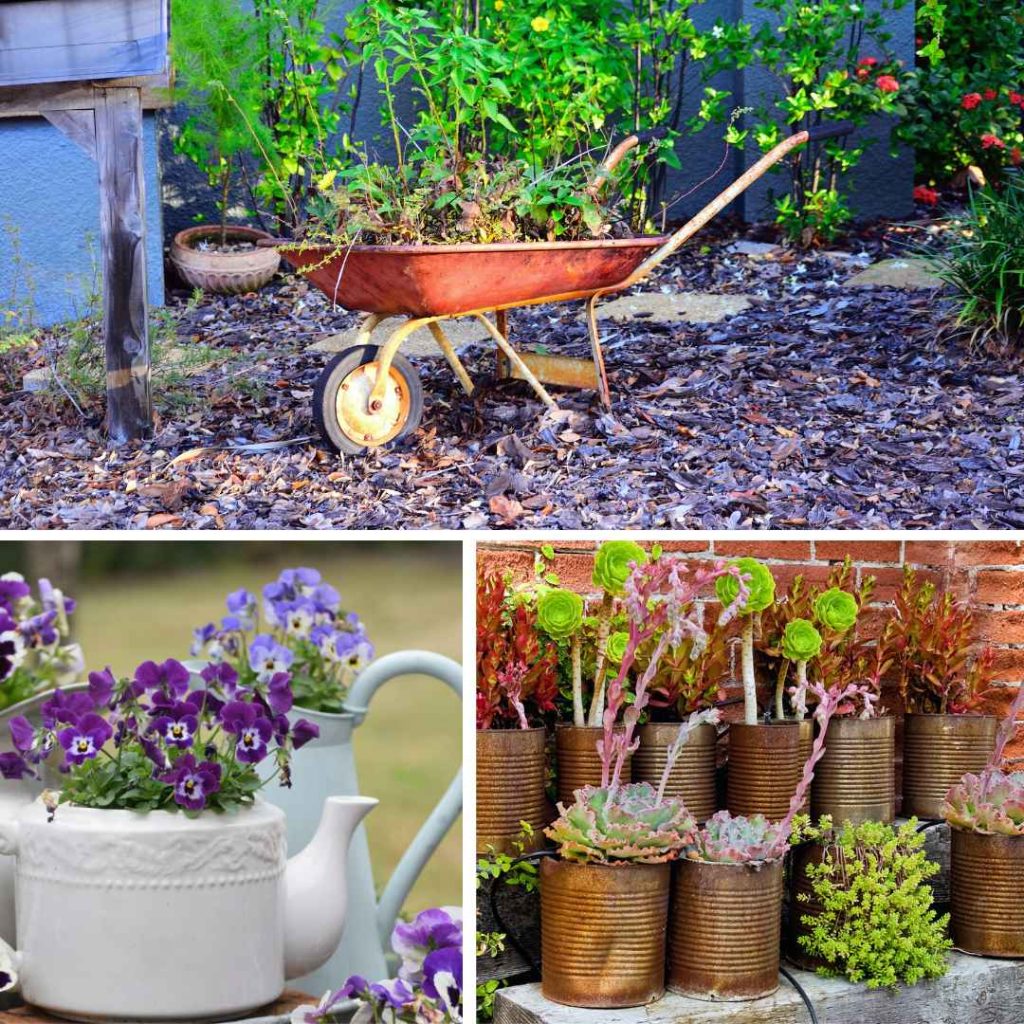
Repurposed container gardens are a cost-effective way to add personality and charm to your garden. Old objects like tires, tins, or buckets can be used as planters to create unique displays that express your style.
These containers can be found at thrift or home stores and can be used for various plants, such as succulents, tiny flowers, or herbs.
Tires can be stacked, hung, or laid flat to create larger planters for shrubs, flowers, or vegetables. When painting and decorating containers, ensure they are clean, choose durable outdoor paint, and add finishing touches like buttons, twine, or beads. To protect the design from weather, paint can be covered with a clear sealant.
Pallet Planters
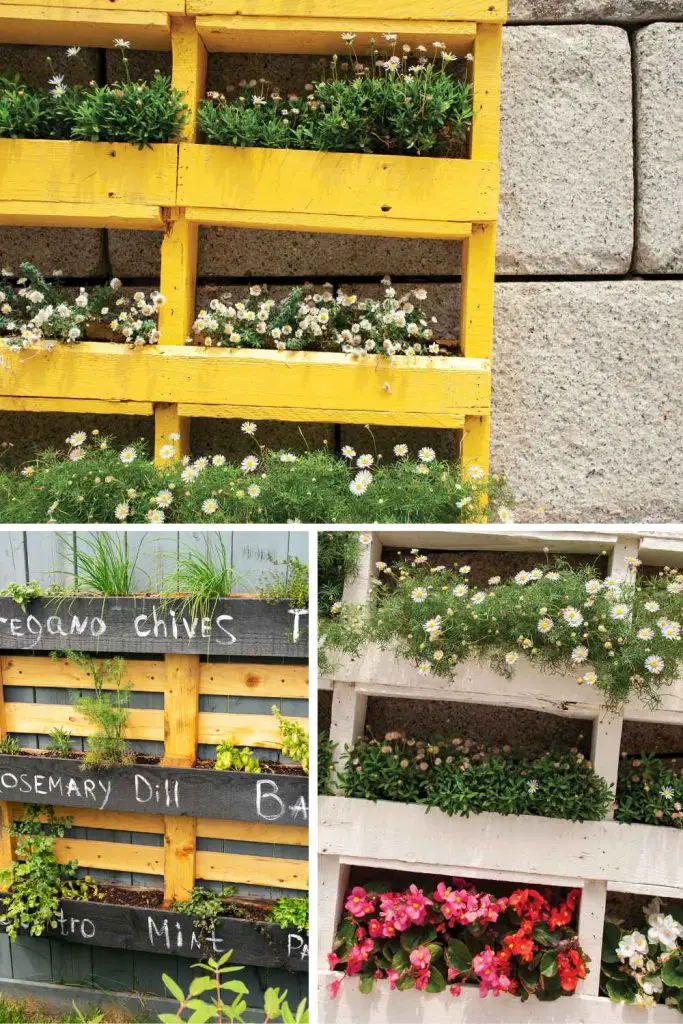
Pallet planters are a creative and efficient way to grow plants in small spaces. These wooden pallets, often used for storage and transportation, can be transformed into planters, allowing for the growth of various plants even in cramped areas.
They are easily obtained and are perfect for vertical plant support due to their robust design.
To plant in pallets, select a high-quality pallet, sand down uneven edges, and use an outdoor wood sealant if desired. Line the bottom and back of the pallet with landscape fabric or weed barrier, leaving space for planting.
Arrange plants that thrive in local lighting and water the pallet after planting. Maintenance is crucial as vertical gardens can dry out faster than traditional gardens.
Herb Spiral Garden
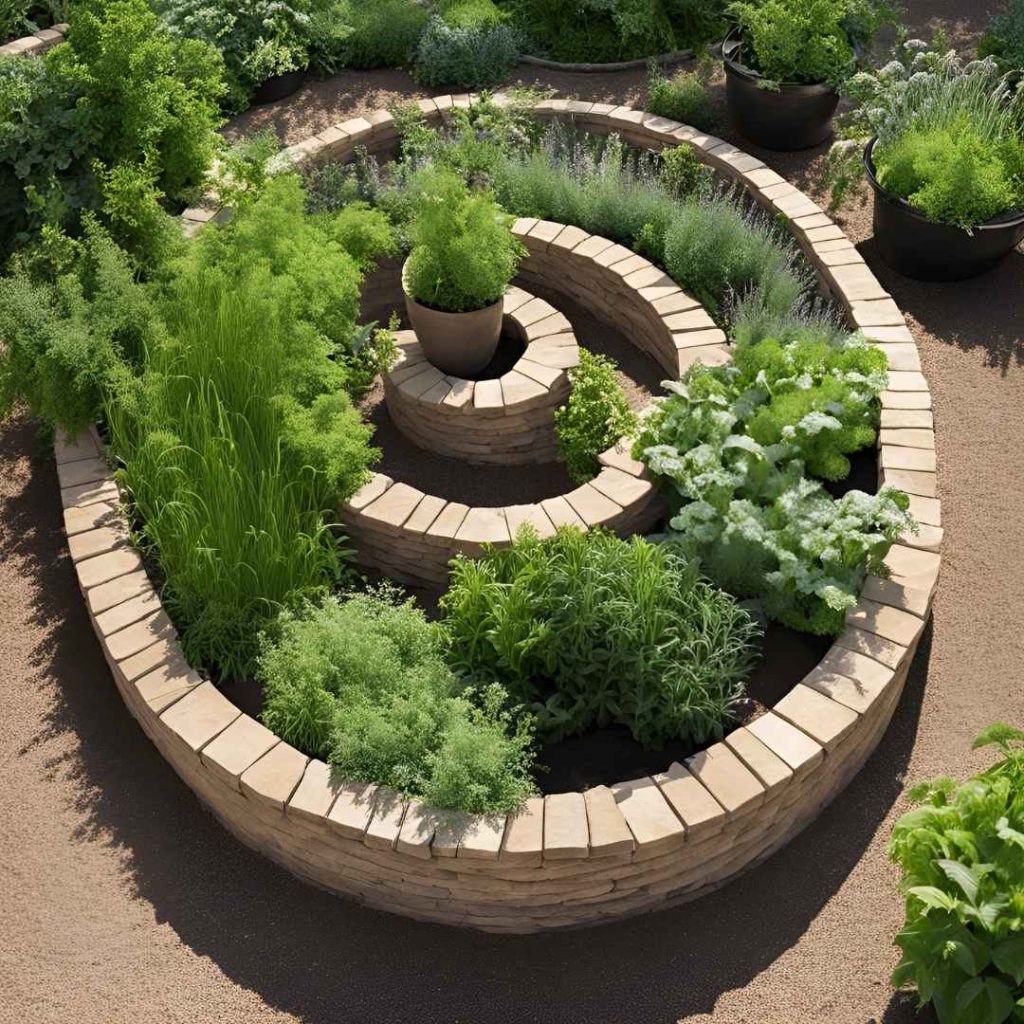
A spiral garden can be created using bricks, stones, or salvaged materials. Choose a sunny location with adequate drainage and level the base. Arrange repurposed materials in a circle on the ground, stacking them gradually to create a spiral effect.
Assemble the materials into a rising spiral shape by stacking and bending them. Use a rich, well-draining soil mixture and blend it with compost.
Arrange herbs in tiers within the spiral, placing sun-loving ones higher and shade-tolerant ones closer. Mulch surrounding plants to retain moisture and discourage weed growth. Water and maintain the spiral well, especially the upper tiers.
DIY Garden Edging
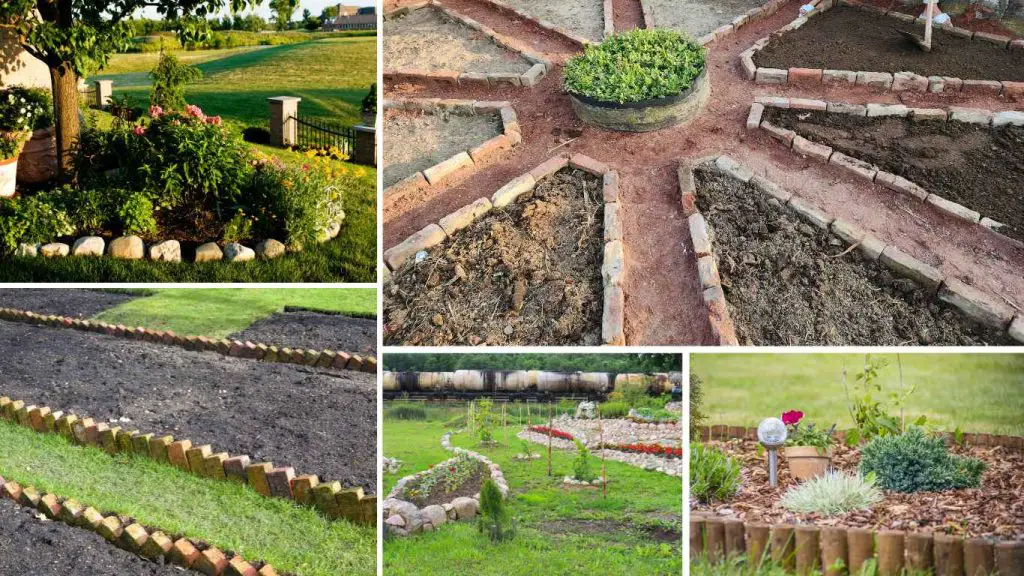
Plan your design, level the ground, tidy the area, and remove any debris before creating garden edging. For stability, add a thin layer of sand or gravel to the edge.
Make sure the bricks are level and aligned as you arrange them in the desired pattern. For a more natural appearance, place stones closely together or slightly overlap them.
Use planks or logs for wooden edging, fastening them with pegs or stakes. Use landscaping adhesive or mortar to firmly anchor the edging, or use stakes or posts.
For a tidy appearance, fill in any spaces with mulch or soil. For a distinctive look, combine different materials, and make sure the edging is regularly maintained and checked for quality.
Painted Rocks for Garden Markers

This is an easy do-it-yourself project that uses sealant, acrylic paint, and smooth stones. The stones should first be thoroughly cleaned and allowed to dry.
Use an acrylic paint base coat to create a background color that is consistent. Create and label patterns, designs, or other decorative elements on the stones.
Employ contrasting hues to make text easy to read. To prevent the designs from fading and weathering, apply a clear acrylic sealer after the paint has dried.
To identify different plants in your garden, place the painted rocks there. Let each layer of color dry before adding more if you’re using multiple colors. If you live in a humid climate, think about using waterproof paint and sealant. Use larger or rougher-surfaced stones for increased durability.
DIY Garden Lighting
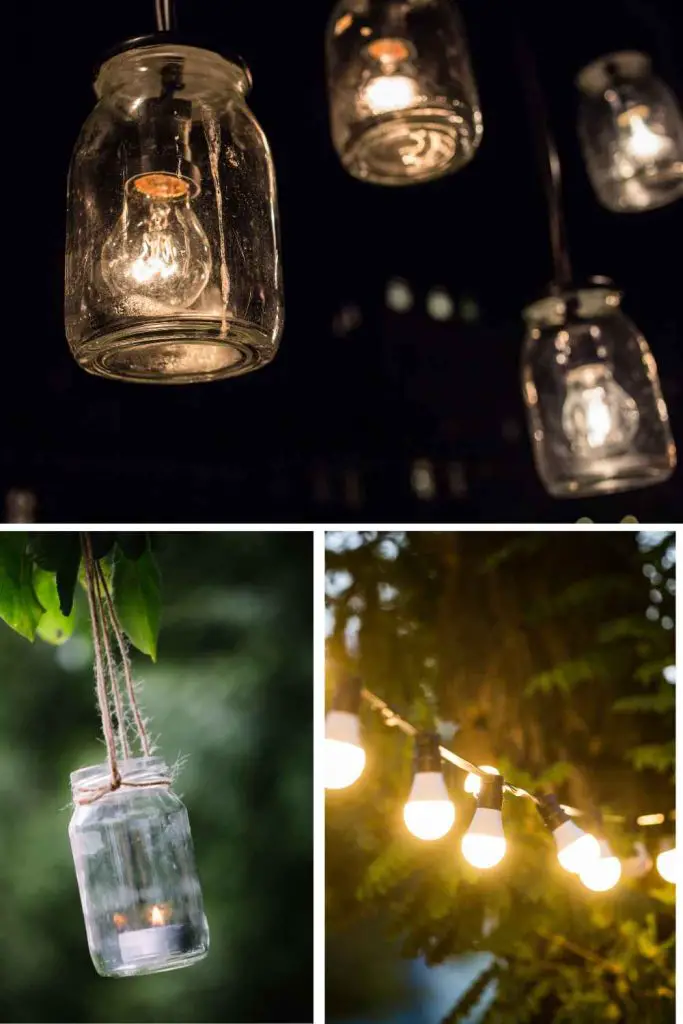
Make Mason Jar Lanterns with string lights, solar lights, or Mason jars. You can create solar-powered Mason jar lanterns by gathering the necessary supplies, cleaning them, and either using tea light candles that run on batteries or solar power.
To create a cozy glow, you can arrange the lanterns on tables, along pathways, or throughout the garden. LED string lights are one type of light that can be used for durability and energy efficiency.
There are several ways to arrange them, such as draping over fences, hanging from hooks, or wrapping around trees. String lights can be supported by installed hooks or clips. The power source is accessible, and the lights can be hung in equal intervals.
Place the solar panel in a sunny spot or plug in the lights to ensure proper operation. To create the best effect for your garden, try different lighting arrangements, use weather-resistant or waterproof lights, and use colored or patterned jars for visual interest.
Homemade Bird Feeder
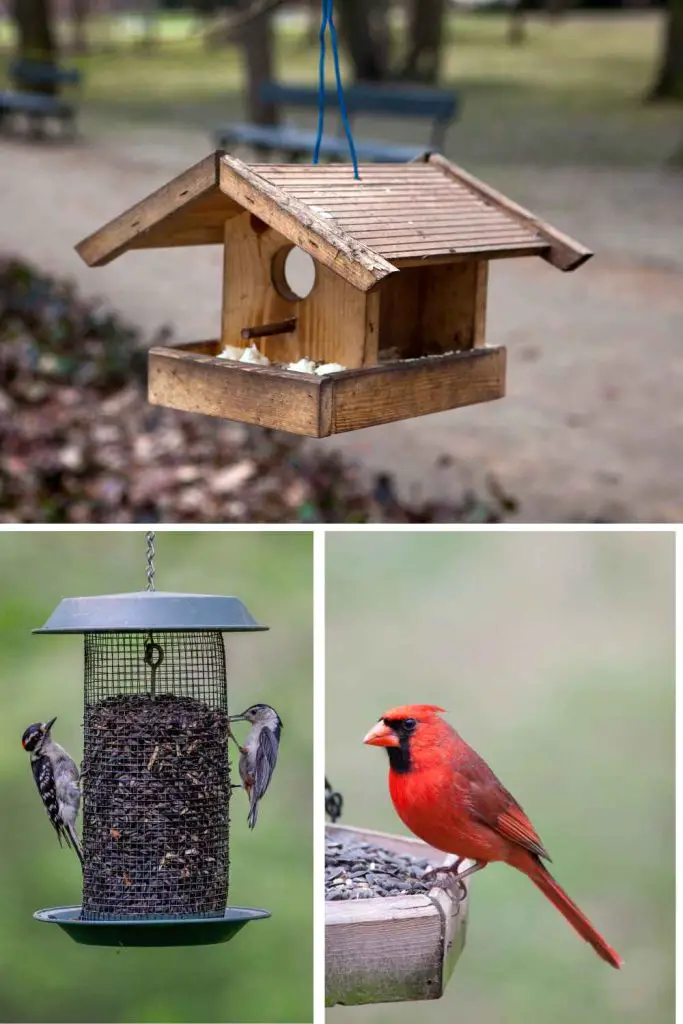
This is a quick and easy method for making bird feeders out of pinecones, birdseed, peanut butter, and string. Gather clean pinecones and allow them to air dry first. Make sure peanut butter gets into all of the cracks on each pinecone by spreading it evenly over them.
To make sure the birdseed sticks well, roll the pinecones in it and press firmly. For more coverage, plant extra seeds. To make a loop for hanging, tie a 12-inch length of twine or string around the top of the pinecone.
To make the feeders easily visible and accessible to birds, hang them from tree branches or garden hooks. To draw in various bird species, experiment with different bird seed mixtures.
Recycled Garden Art
Make garden art out of broken ceramics, metal scraps, and old tools. Materials must be gathered, the design must be planned, tools must be cleaned and rustproofed, ceramics must be broken or cut, and metal scraps must be cleaned.
After that, the artwork is put together using sturdy glues, wire, welding, or, in the case of metal sculptures, metal wire or rods.
Ceramic components are assembled and adhered to a mosaic art base. After that, the artwork is placed prominently in the garden and, if needed, secured.
I also recommend applying paint or varnish for color enhancement and protection, as well as weather-resistant adhesives and finishes to guarantee the artwork endures.
Simple Water Feature
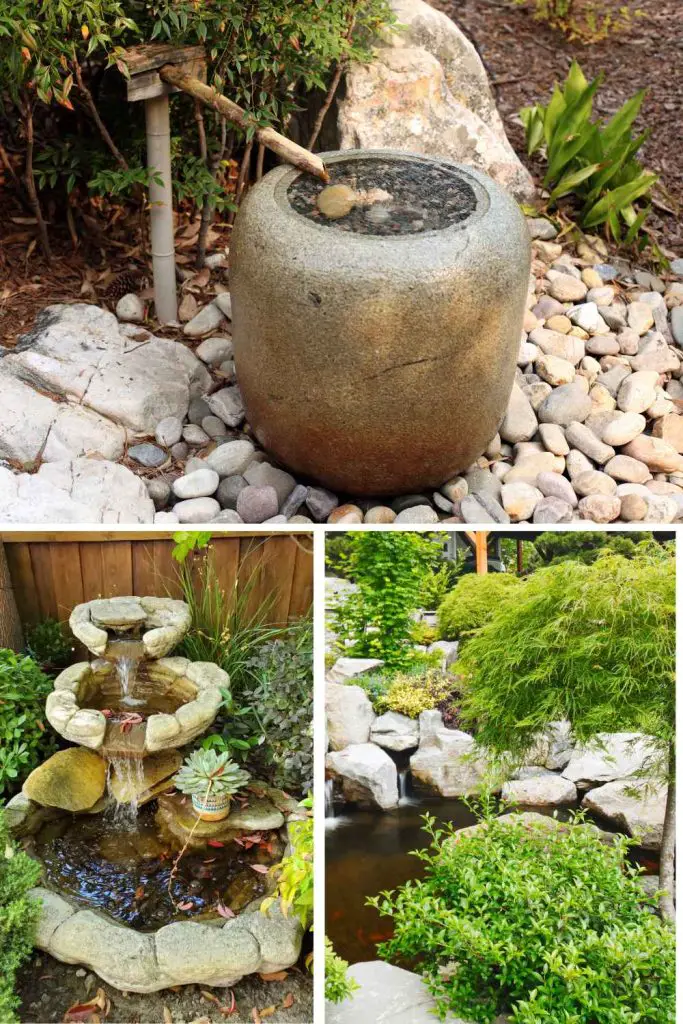
This is a straightforward water feature that can be installed in a garden with stones, a large bowl, and a pump. The steps include choosing a spot close to a power source, getting the bowl ready, setting up the pump, adding stones for a decorative and natural effect, adding water, testing, and adjusting the water flow or stone placement.
Use an adjustable pump with height and speed control, add small fish or aquatic plants for visual appeal, check the water level frequently, and clean the pump to preserve the water feature’s functionality.
In your garden, this easy-to-use water feature has the power to establish a miniature ecosystem.
DIY Garden Trellis
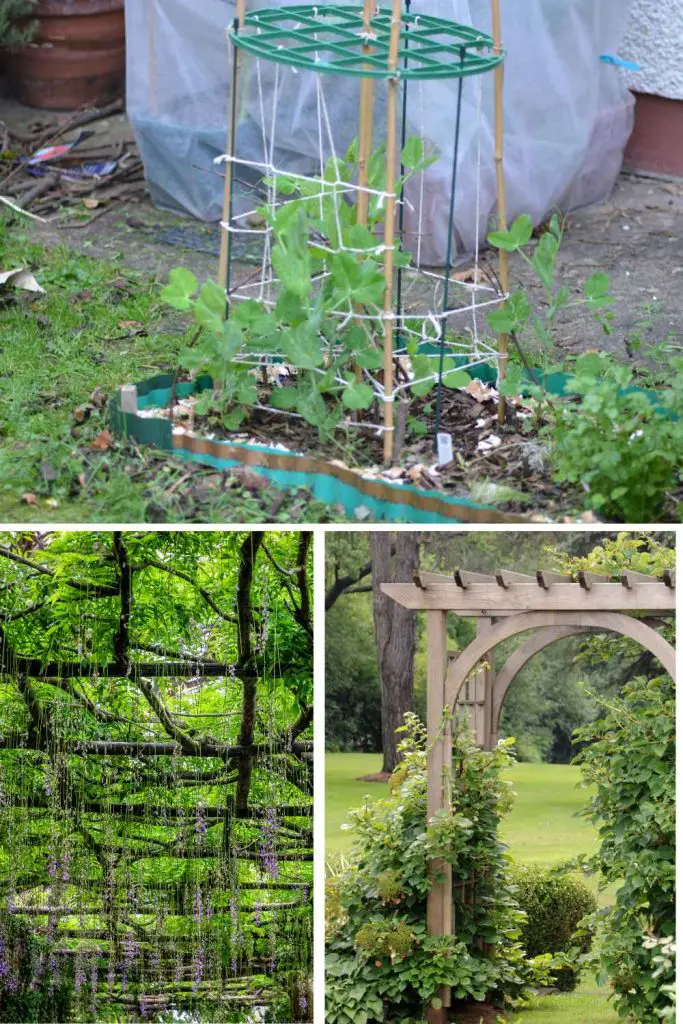
This is a basic how-to for making a trellis out of bamboo, wooden sticks, or used ladders. After deciding on a design, cut and clean the materials (such as bamboo or wood sticks) to the appropriate lengths.
Using nails, wire, or garden twine, assemble the trellis to provide stability and support for climbing plants. If the ladder is old, prop it up or lean it against a wall or fence. Stakes or burying the base in the ground can be used to anchor the trellis in place.
Teach climbing plants to climb up trellis, then fasten them down with plant ties. For longevity, use weather-resistant bamboo or wood; stain or paint wooden trellises to match your garden’s style; and periodically check the plants and trellis for growth and adjustments.
DIY Garden Bench
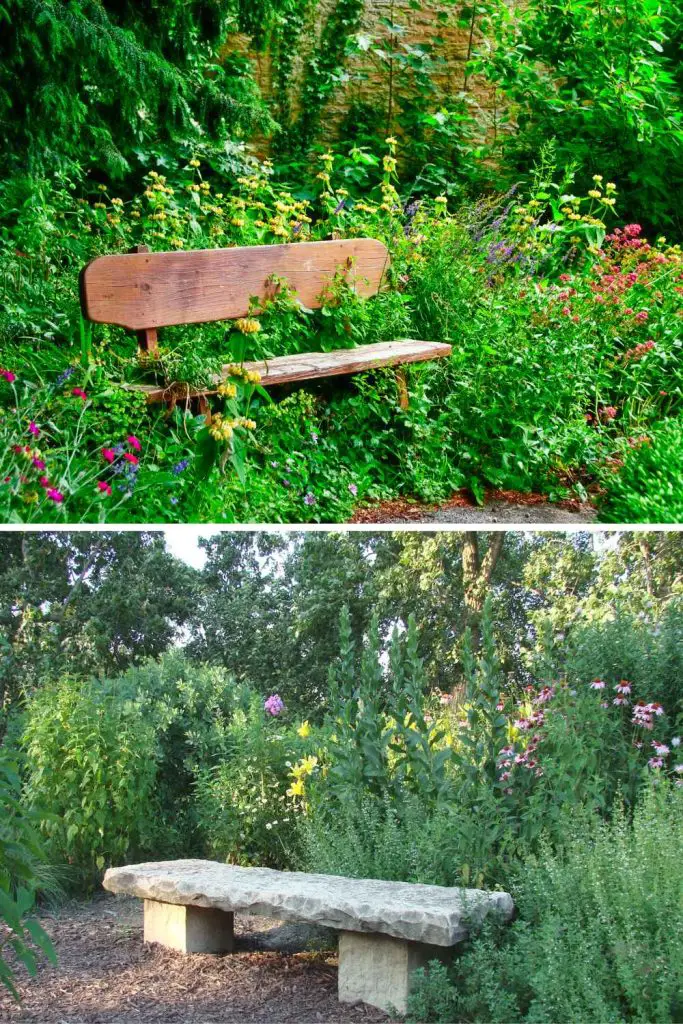
This is a straightforward bench made out of wooden planks and cinder blocks. To construct the desired height, place the cinder blocks in two parallel rows in a stable spot in your garden, then stack them.
Finally, cut and sand the wooden planks to the desired length. Use outdoor paint or wood sealant for durability.
After arranging the planks evenly over the stacked cinder blocks and fastening them with outdoor screws or brackets, check the bench’s comfort and stability.
Consider adding a backrest or armrest, using outdoor cushions or a bench pad for extra comfort, and painting or staining the cinder blocks for a more finished appearance.
Decorative Garden Path
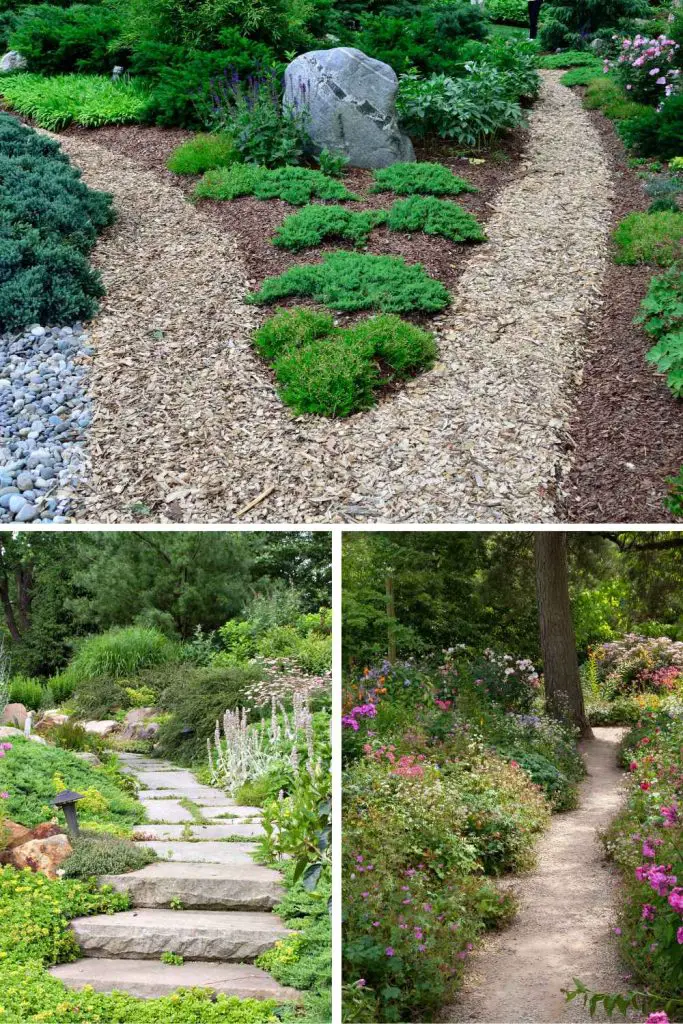
This tutorial will show you how to make a stepping stone path out of wood slices, pebbles, or stepping stones. The steps in the process are laying the materials, clearing the space, filling and finishing the path, testing the path for comfort and stability, and planning the path.
The materials can be used to create a smooth surface, and the path can be designed in a straight line, curve, or more complex pattern.
To increase the materials’ longevity, think about applying a wood preservative to wood slices and replacing pebbles or stepping stones on a regular basis.
Upcycled Rain Barrel
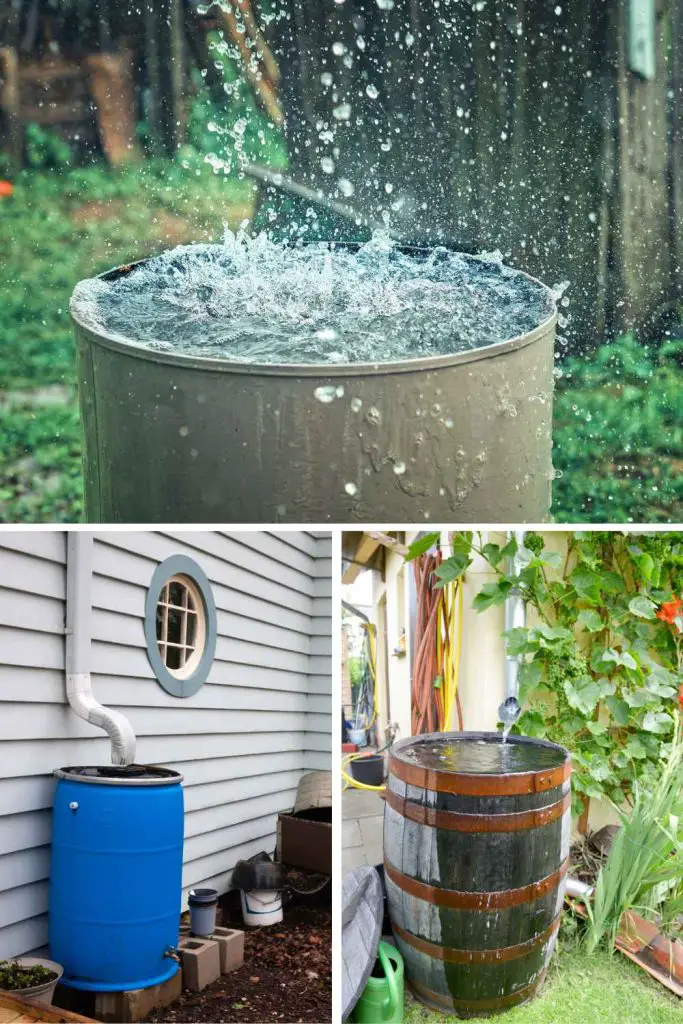
This is a basic rainwater collection system that makes use of a spigot and an old barrel. There should be no contaminants or leftovers in the barrel. To stop leaks, the spigot needs to be placed into a hole close to the barrel’s bottom, and waterproof sealant applied.
Over the top, a screen should be positioned to collect leaves and other debris while still enabling rainwater to flow. After being attached to a downspout and set up on an elevated platform or stand, the barrel needs to be checked for leaks.
The system needs to be painted outside to match the garden’s aesthetic or to shield it from the sun’s rays. You can use a cover or lid to stop mosquitoes from breeding. Maintaining the barrel’s functionality requires routine cleaning and inspection.
DIY Garden Fountain
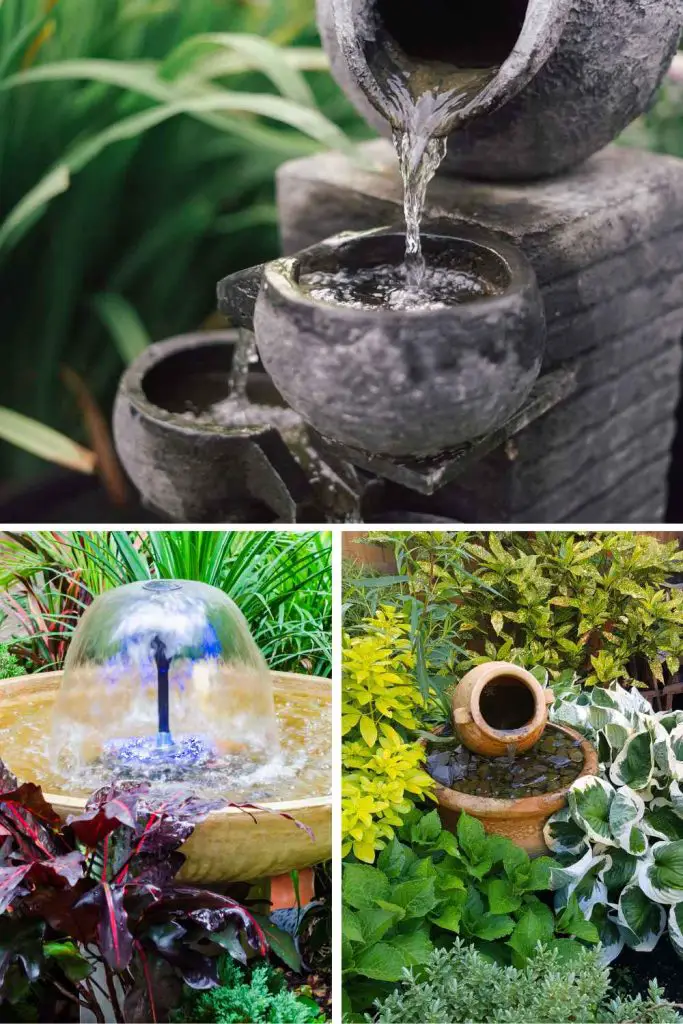
This is a straightforward cascading fountain constructed out of stones, a submersible water pump, and ceramic pots. The pots ought to be spotless and devoid of cracks.
The bottom pot serves as the reservoir, and the pump needs to be firmly placed inside. Each pot needs to have a drainage hole, and they should be stacked in a stack.
Water should flow from the top pot down through the other pots, and the pump should be connected to the top pot via tubing. To make sure the intended cascading effect is achieved, the fountain should be tested.
To keep the look of the pump and pots looking good, use waterproof sealant, add floating candles or aquatic plants, and clean them frequently.
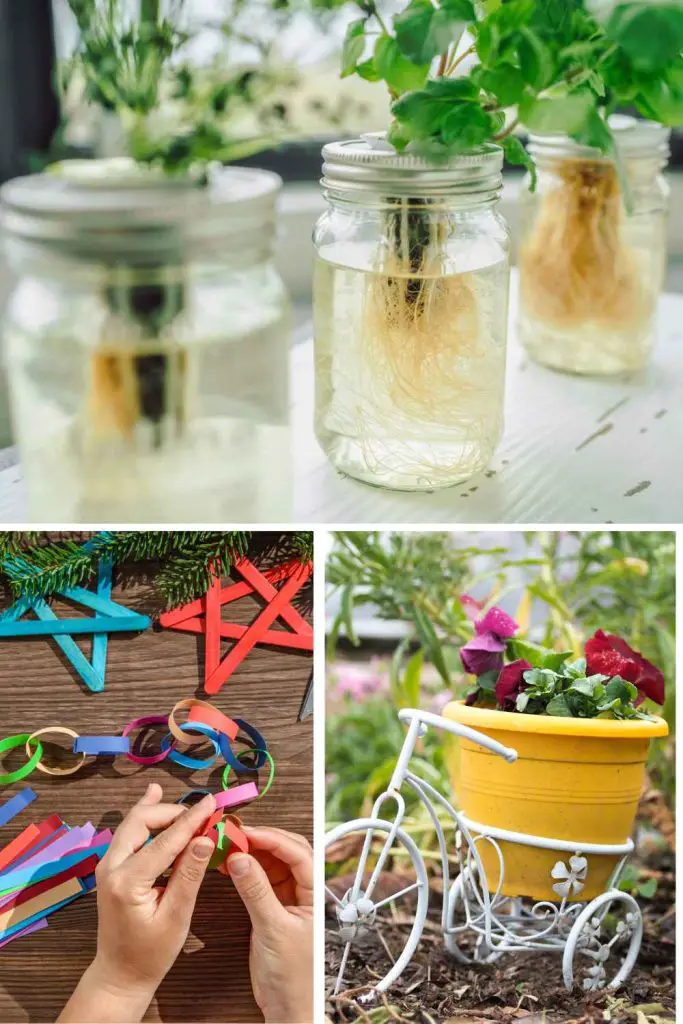
Hanging Planters from Recycled Materials
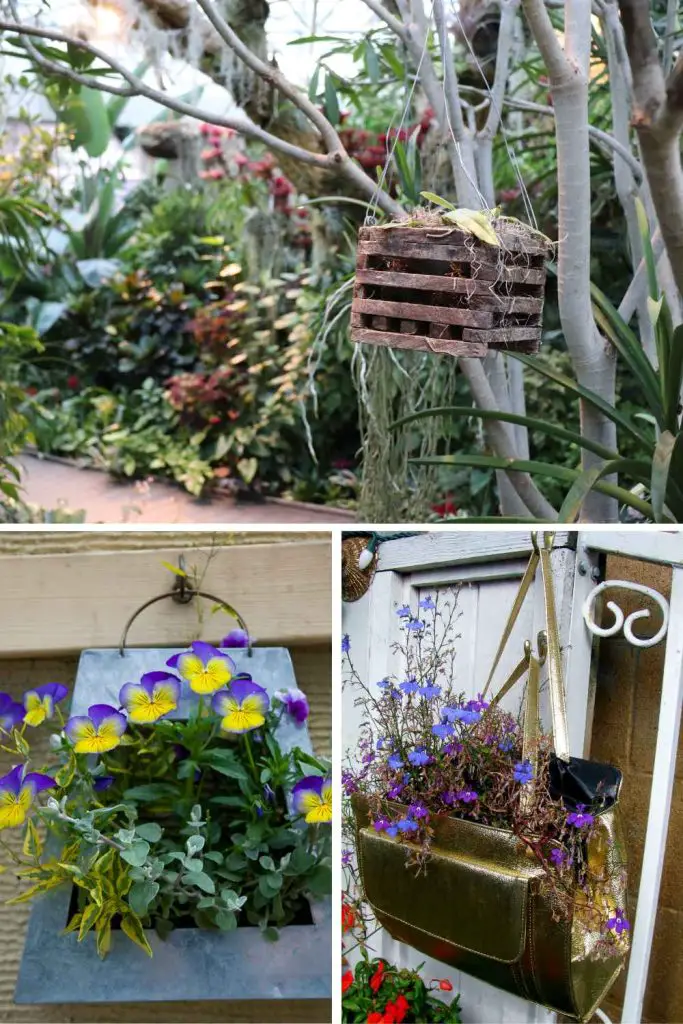
This is a quick and easy way to upcycle used bottles, cans, or containers into hanging planters. Sand the rough edges, drill drainage holes, and gather clean, dry containers. Attach a hanger, trim the hanging material to the appropriate length, and use paint or markers to decorate the exterior before hanging.
After adding soil and plants, fill the space with a potting mix that is lightweight, and plant the plants at the proper depth. Choose a good location for the planters in your patio, balcony, or garden, and fasten them with hooks, nails, or a strong horizontal bar.
To keep moisture levels stable, use water-retaining crystals and light soil to minimize weight. For a vertical garden effect, group several hanging planters together.
Recent Posts
Planting Tomatoes This Way Changed Everything – Deep Hole Method for Bigger Tomato Plants
Before planting a new crop, it is always a good idea to prepare the bed properly. In this case the bed was previously used for growing sweet peas. The plants produced well and once the harvest was...
48-hour seed test that reveals which cucumber seeds are alive — try this tonight
Germinating cucumber seeds is an important first step for any gardener. Starting seeds before planting them in soil ensures higher success rates and saves time. By germinating seeds first, you can...