
I hate pulling weeds. Always have. So when I looked at my overgrown plot in October, I wasn’t about to spend a weekend on my knees yanking roots out of the ground.
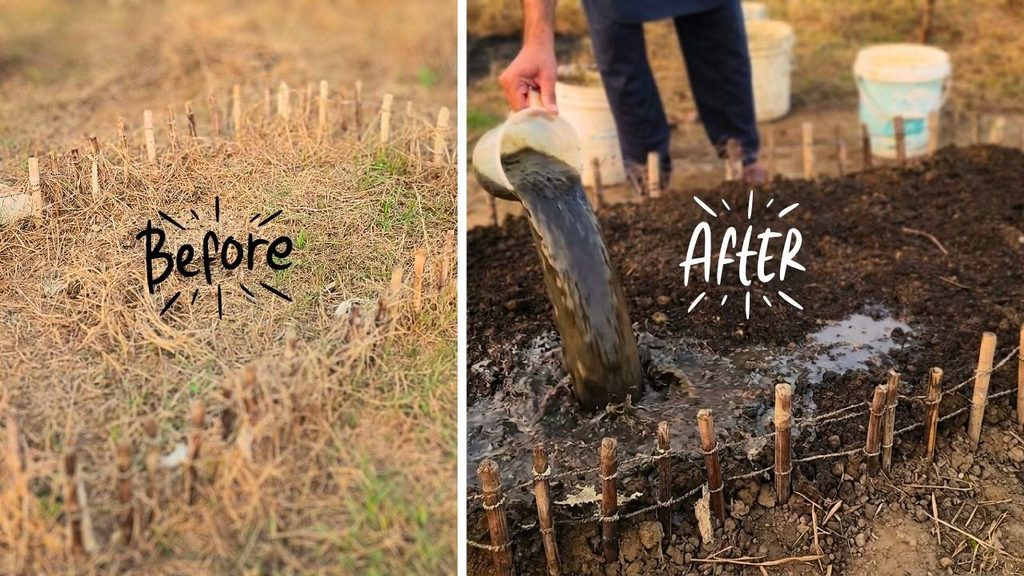
Instead, I buried the weeds. This is basically lasagna gardening (also called sheet mulching): you stack layers on top of the weeds and let everything rot down into the soil. No digging, no hauling, and most of the stuff came from my own yard.
Here’s exactly what I did.
What you’ll need
- Plain cardboard. Enough to cover the whole plot with overlap.
- Bulky organic stuff. Twigs, small branches, dry leaves, kitchen scraps, old plant trimmings.
- Loamy garden soil. I used about 7 5-gallon buckets for a bed that’s 3 feet by 7 feet.
- Finished compost. A thin layer, so 1 5-gallon bucket is plenty.
- For the liquid mix (optional): weeds, raw potatoes, a bucket, a handful of compost, crushed charcoal.
- Sawdust. Untreated wood only.
Total cost: about $10, or “almost nothing, since most of it was free”
Time: 1 hour of work, plus 2 weeks of waiting if you skip the same-day planting
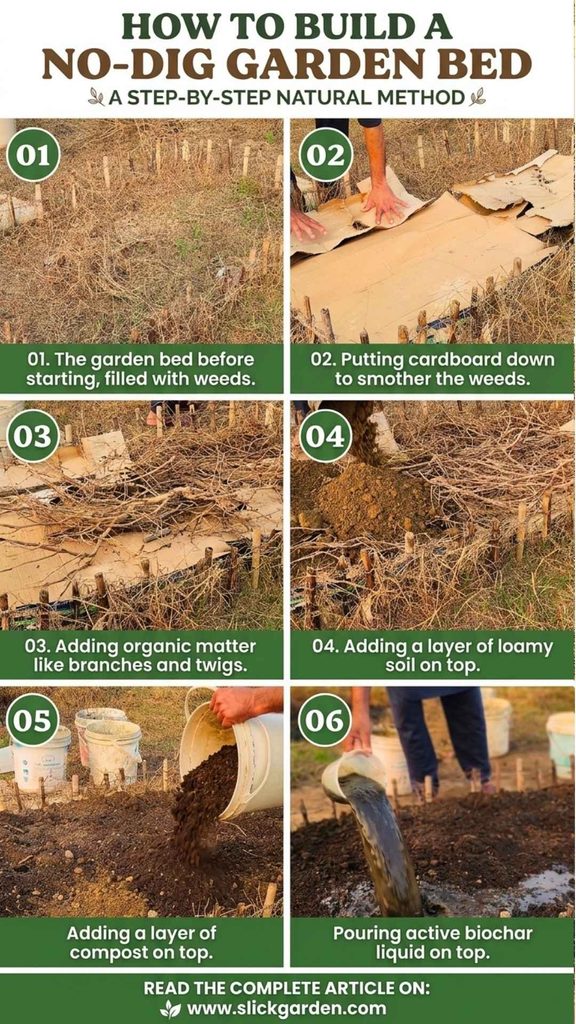
Step 1: Cardboard over the weeds
Lay plain cardboard right on top of the weeds. Don’t pull anything first. The cardboard blocks the light, the weeds run out of stored energy, and they die underneath.
Two things matter here:
- Peel off the tape, staples, and shiny labels. They won’t break down.
- Overlap the sheets by 6 to 8 inches. Weeds are sneaky. Leave a gap, and they’ll find it.
Worms and fungi eat the cardboard over time. Mine was mostly gone after 2 weeks.
Step 2: Pile on the junk
Next comes the bulky layer. I used garden twigs and branches; most of them are dried.
Put the chunky stuff sticks, small branches at the bottom. It leaves air pockets so the pile doesn’t turn into a slimy, smelly mess, and later it soaks up water and releases it slowly. Softer things like veggie peels and coffee grounds go on top. They break down fast and wake up the soil life.
Step 3: Add loamy soil
Cover the pile with a thick layer of garden soil. Aim for loam, which is a mix of sand, silt, and clay.
Avoid soil that’s mostly one thing. Pure clay turns to concrete and holds water on the surface. Pure sand lets water and nutrients drain away before roots can use them. Loam sits in the middle, holding moisture without getting soggy.
My layer was about 2 inches deep. Go thick enough that seedling roots have room before they hit the raw stuff.
Step 4: Add compost
Spread a thin layer of finished compost over the soil. Well-rotted manure or worm compost works too.
You’re not adding it for bulk. You’re adding living microbes- the bacteria and fungi that turn all that raw material underneath into food plants can actually use. Think of it as a starter culture, like the one you’d use for sourdough.
Step 5: The liquid biochar mix (optional, but I like it)
This is the fun part. I ferment a bucket of microbes and pour it over the bed.
What goes in:
- Weeds from the garden
- A few raw potatoes (the sugar feeds the microbes)
- Water
- A handful of compost
- Crushed charcoal
- Non-chlorinated water or rainwater
The charcoal soaks up nutrients and microbes like a sponge. Once you pour it on the bed, it stays in the soil as a permanent home for them. Unlike compost, it doesn’t break down.
Step 6: Finish with sawdust mulch
Top the bed with 1 to 2 inches of sawdust. It keeps moisture in, stops the soil from baking in the sun, and blocks new weed seeds from landing on your clean soil.
Two warnings:
- Only use sawdust from untreated wood. Treated lumber is a no-go for a food garden.
- Fresh sawdust can steal nitrogen from the soil while it breaks down. That’s why I put it on the surface instead of mixing it in. If your plants look yellow, add a bit of extra compost or a nitrogen feed. It doesn’t happen to me yet.
Don’t go thicker than 2 inches either, or the water will have trouble getting through.
Can you plant right away?
Yes. The raw stuff is buried deep enough that it won’t hurt your seedlings. I planted spinach seeds the same day.
If you can wait, give the bed a few days to settle. The layers compact a bit, and the moisture spreads evenly. But it’s not a requirement.
Over the season, the cardboard disappears, the sticks soften, and you end up with dark, crumbly soil. The roots will follow the nutrients down.
FAQ
How long until the weeds are really dead?
Under cardboard, most weeds die in 10 to 15 days. Tough perennials like bindweed or Bermuda grass may need a second layer or more time.
What’s the best time of year to build this?
Anytime works, but fall is nice because the bed has all winter to break down. I did mine in October.
Can I use newspaper instead of cardboard?
Yes, but use a thick layer, at least 3 to 5 sheets. It breaks down faster, and weeds can push through thin spots.
Do I need the liquid biochar mix?
No. The bed works fine with just cardboard, organic matter, soil, compost, and mulch. The liquid mix is a bonus for extra microbial life.
Will this work in a dry climate?
Yes, and the mulch helps a lot. Water the layers well as you build so the cardboard stays damp and starts breaking down.
Can I grow vegetables in it the first week?
Yes. Start with shallow-rooted crops like lettuce or radishes, or whatever you grew, and go deeper-rooted once the bed matures.
Recent Posts
Garden weeds are usually something we remove and throw away, but green weeds and leaves can be useful when they are turned into a homemade liquid fertilizer. Fresh green plant material contains...
A deep homemade garden bed can be useful for growing different crops throughout the year. A few months ago, this bed was used for a tomato plant, and the plant grew very well. Now that the tomato...