
Does your garden appear a little boring? Are you prepared to give your outdoor haven a makeover? Making a garden bed ready for shrub planting is the only thing to consider. The ideal conditions for your shrubs to thrive can be created with the correct placement, soil preparation, and upkeep.
We’ll take you through all the necessary actions in this article to prepare your garden bed for planting, from clearing the space to adding mulch and nutrients.
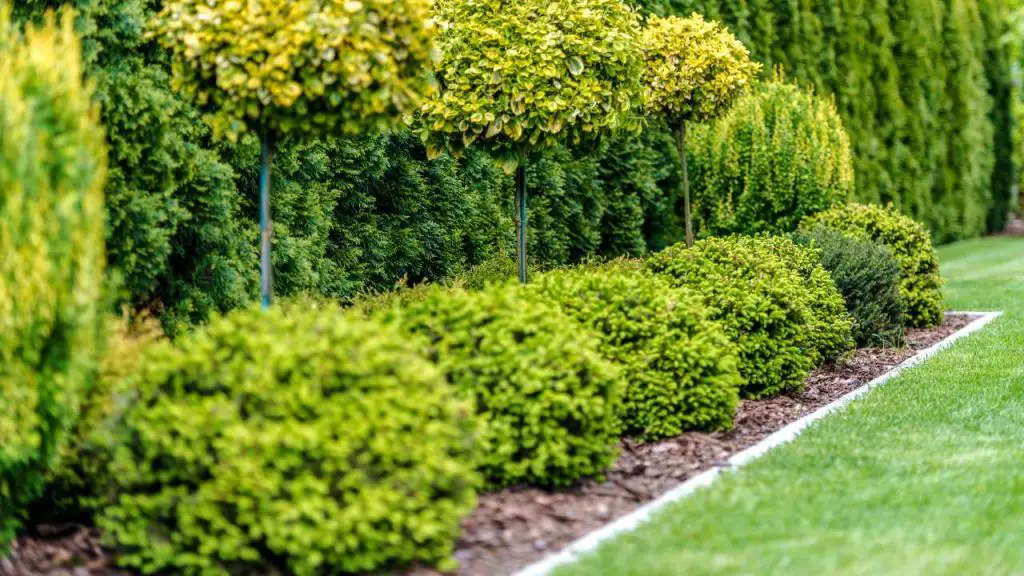
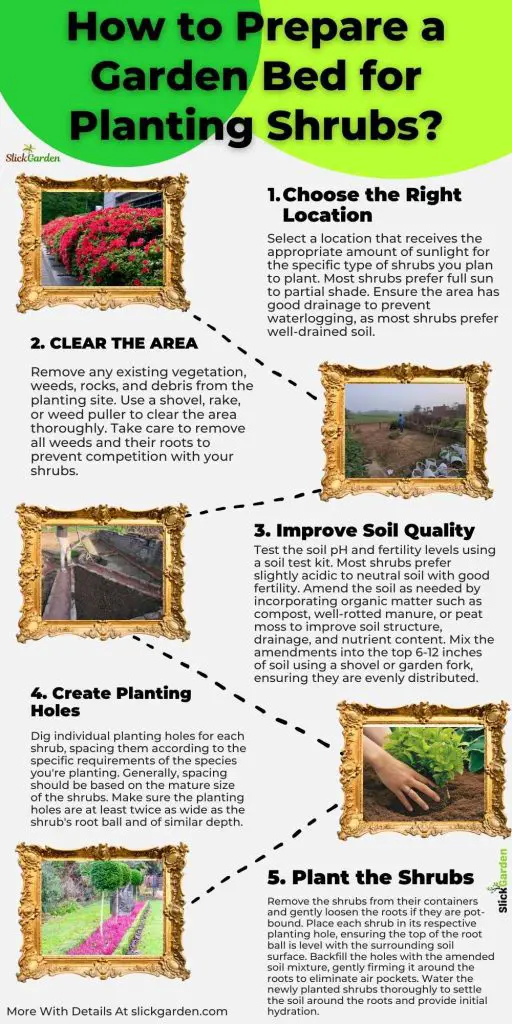
Choose the Right Location
Sunlight is one of the most important things to think about for both flowers and shrubs, if not the most important thing. For most shrubs to grow well and do their best, they need “full sun,” which means “at least 6 hours of direct sunlight per day.” Most of the time, eight hours of light is even better.
Make sure there is easy access to water near where you want to garden. Having to carry water to plants that are thirsty during a heat wave is the fastest way to wear out a new gardener. Also, if you have water nearby, you’re much less likely to skip it when you’re not feeling very motivated.
A garden should be put somewhere with rich, loamy soil. There is no way to grow plants if the soil is bad or too thin. You will have to do some work to get it ready (see below). If you have a lawn, taking a quick look at your yard is a good way to tell how good your soil is. If it looks lush and healthy, the soil is probably good.
Clear the Area
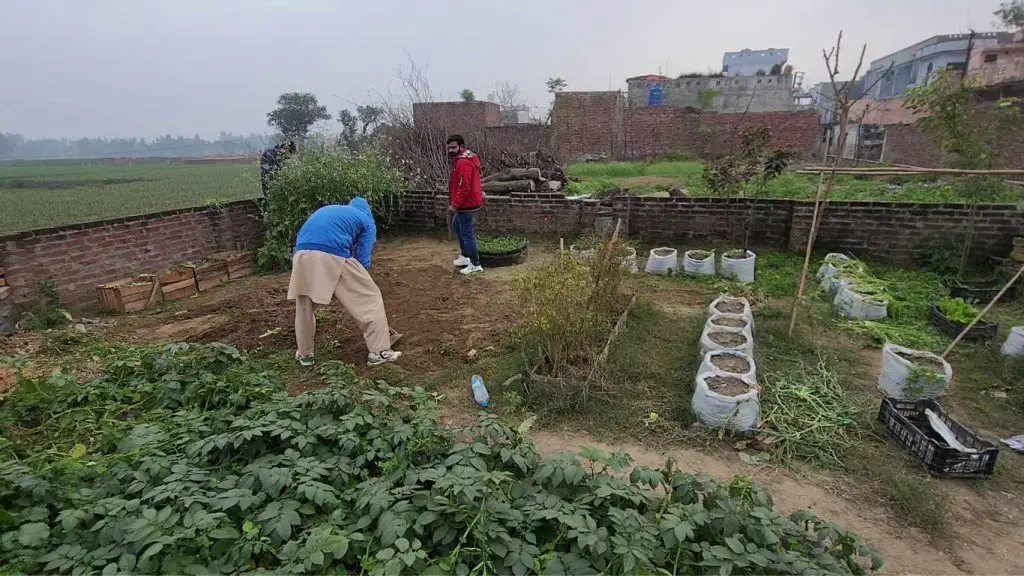
Prior to planting your shrubs, it’s important to remove any current vegetation, rocks, or debris from the area. This process will provide a fresh start for your new plants to establish themselves and grow successfully.
Make sure to pull up any weeds, remove rocks, and rake away any debris to provide your shrubs with the necessary space to thrive. After clearing the area, focus on enhancing the soil quality to create a favorable environment for thriving shrubs in your garden.
Improve Soil Quality

Adding organic matter like compost or well-rotted manure to the soil can make it better. These additions can help make the soil better, giving your shrubs the nutrients they need to grow well.
Soil Testing: Knowing how the soil is right now is important before you plant shrubs. Testing the soil is a good way to learn about its pH levels, nutrients, and structure. You can get help from your local agricultural extension service or buy a soil testing kit at a garden center. Soil testing lets you know if you need to make any changes to the soil to make it more fertile and stable.
Amend Soil: Depending on the results of the soil test, you may need to change the soil to give your shrubs a better place to grow. Some common soil amendments are:
- Organic Matter: Adding peat moss, compost, well-rotted manure, leaf mold, or compost helps the soil hold on to water and nutrients.
- Mineral Amendments: Depending on what the soil test says, you may need to add certain minerals, like lime to change the pH level or gypsum to help clay soils drain better.
Till the Soil: After adding the changes, mix them into the soil well with a garden tiller, fork, or shovel. To make sure the amendments are spread out evenly, till the soil to a depth of at least 12 inches (30 cm). This process makes the soil more porous, drains better, and spreads nutrients more evenly, which makes it perfect for root growth.
Related Articles:
- Every Thing About Watering Your Plants In A Raised Bed Garden
- Everything You Need To Know About Adding Worms In Your Raised Bed Garden
- How To Make A No-Dig Raised Bed
Add Nutrients and Amendments
A lot of garden soils are good for you, especially ones that have a lot of organic matter in them. However, if a soil test or sick plants tell you that your plants need more nutrients, you can choose between synthetic or natural fertilizers.
Synthetic fertilizer has some good points. It works faster and costs less than organic fertilizer most of the time. But it doesn’t change the soil; it just gives the plants food.
Along with that, its high salt content could sometimes hurt the soil. Organic fertilizers, on the other hand, give off their nutrients slowly over time. You won’t feel better right away like you do with synthetic fertilizers. You will get a longer, more steady feeding, though.
The nutrients in fertilizers vary. Nitrogen, phosphorus, and potassium are the three main nutrients that make up complete fertilizer. Different plants need different amounts of nutrients, but most of the time, a complete fertilizer is best.
A soil test can give you more specific advice on what kind of fertilizer to use and how much to use. Follow the directions on the fertilizer’s label for how to use it. Some types, like granules, are mixed into the soil, while water-soluble ones are put on with a sprayer or watering can.
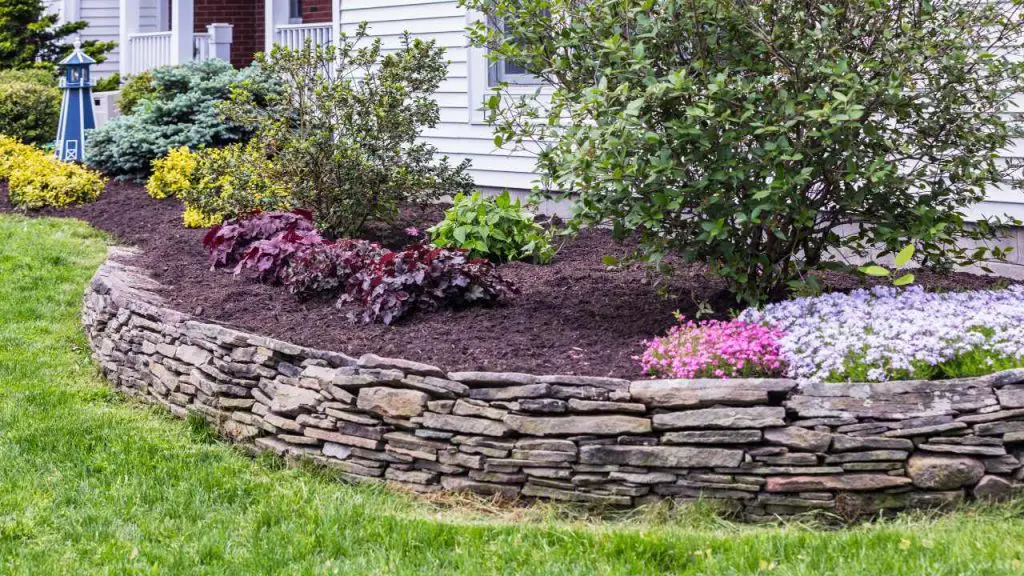
Level and Mulch the Bed
After adding nutrients and amendments to improve the soil, it’s time to level the bed so that it’s a flat surface for planting. This step will help the water spread out evenly and stop it from pooling or running off, which could hurt your shrubs.
After leveling the bed, add a layer of mulch to help keep the soil moist, keep weeds away, and keep the temperature stable. A layer of mulch also gives your garden bed a polished look, making it look clean and neat.
You can now protect and maintain your garden bed to help your shrubs stay healthy and grow. Once the bed is level and mulched, you get to the next step.
Planting Shrubs

Get the Shrubs Ready: Carefully take the shrubs out of their pots. Squeeze the sides of the pot gently to loosen the root ball if the shrubs are in them. Do not pull the bush out by its stem, as this could hurt the plant.
If the roots are wrapping around the root ball, gently pull them apart or cut them along the sides in a few places to help them grow outward.
Make holes for plants: For each shrub, dig a hole in the ready garden bed. The holes need to be at least twice as wide as the root ball and just a little less deep than the root ball. The roots can spread out and become rooted in the soil around the root ball thanks to the extra space around it. Once the plant is in the ground, the hole should be deep enough so that the top of the root ball is level with the soil around it.
Placement: Carefully put each bush into its own planting hole, making sure it sits at the same depth it was in its pot. Place the shrubs according to your design plan, taking into account how far apart they need to be and how big they will get when they’re fully grown.
Backfill: After putting the shrub in place, fill in the hole with the dirt that was taken out when you dug. Fill in the space around the roots slowly, making sure there are no air pockets. To make the shrub stable, lightly pack down the soil around its base.
Watering: Once the shrubs are planted, give them a good soak in water to make the soil settle around their roots and get rid of any air pockets. For new roots to grow, watering is also helpful. Make sure you water deeply enough to cover the whole root ball with water.
Related Articles:
Protect and Maintain Your Garden Bed
To keep your garden bed in good shape, you need to keep an eye out for things that could hurt your shrubs. Check the bed often for signs of diseases or pests that could hurt your plants.
Weeds can take nutrients and water away from your shrubs, so get rid of any that come up. Also, keep an eye out for any severe weather that might hurt the health of your garden bed.
You might want to put up a barrier or fence to keep animals that aren’t supposed to be there out of your plants. You can make a great place for your shrubs to grow by taking care of your garden bed and being proactive about what it needs.
Recent Posts
Don't Throw Away Expired Bread: Turn It Into a Simple Homemade Fertilizer
Most people throw away expired bread without thinking twice. While bread is no longer safe to eat once it has spoiled, it can still be useful in the garden. Instead of adding it to the trash, you can...
My Eggplants Were Covered in Weeds and Pests—These Simple Steps Brought Them Back to Life
Heavy rain can be a blessing for a vegetable garden, but it can also create new challenges. Eggplants respond well to moisture, yet the same conditions that encourage healthy growth also promote...