
When we plant potatoes in ridges, there is always some empty space between two ridges. Instead of leaving this space unused, we can put it to good use by adding leaves and kitchen waste. This material will slowly break down and add nutrients and organic matter to the soil.
In this method, we will fill the empty spaces between the ridges with green material, cover everything with loamy garden soil, and then mound more soil around the potato plants. It is a simple way to improve the soil while giving the developing potatoes more covered space underground.
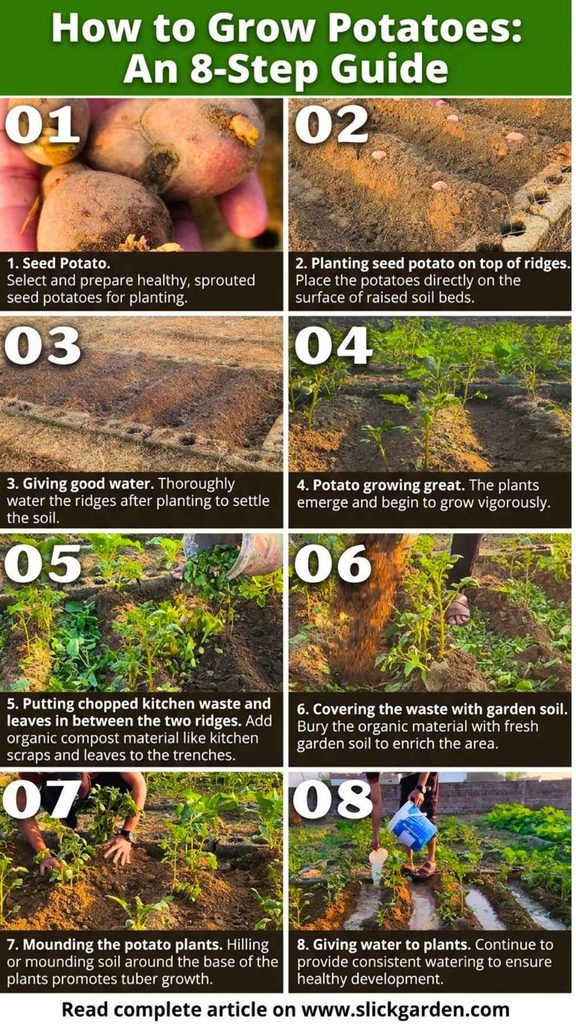
Adding Leaves and Kitchen Waste Between the Ridges
As you can see, we have two ridges with an empty space between them. We are going to fill this space with fresh green leaves and kitchen waste.
We have collected these materials from our garden and kitchen. You can use garden weeds, freshly cut leaves, vegetable scraps, and other soft plant materials. I usually prefer using whatever is available in the garden rather than throwing it away.
Start putting the leaves and kitchen waste in the empty space between the ridges. You can add a good amount, but don’t make the layer too thick. We just want enough material to cover the space between the ridges.
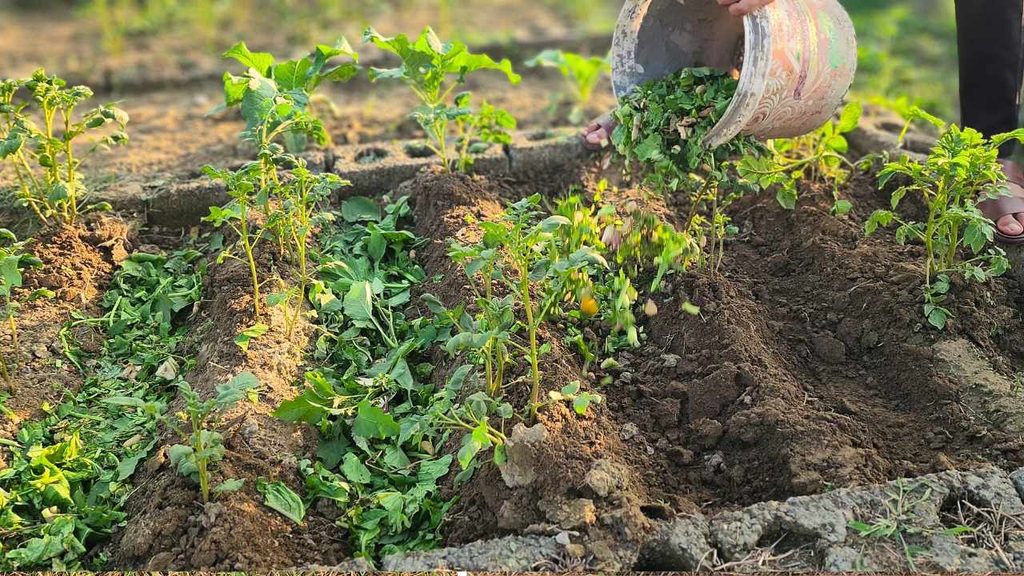
As this material breaks down, it will release some nutrients into the surrounding soil. Earthworms and other soil organisms will also help with decomposition. Over time, the material will become part of the soil and add organic matter.
Potatoes need a good supply of nutrients while they are growing. They are developing new leaves, stems, roots, and underground tubers, so we want to keep the soil in good condition throughout the growing season.
One thing to remember is to avoid diseased plants and weeds that have mature seeds. Also, keep the green material away from the potato stems rather than piling it directly against the plants.
Cover Everything With Loamy Garden Soil
After adding the leaves and kitchen waste, we will cover everything with soil.
We are using ordinary loamy garden soil for this job. If you have finished compost available, you can use that too or mix a little compost with your garden soil.
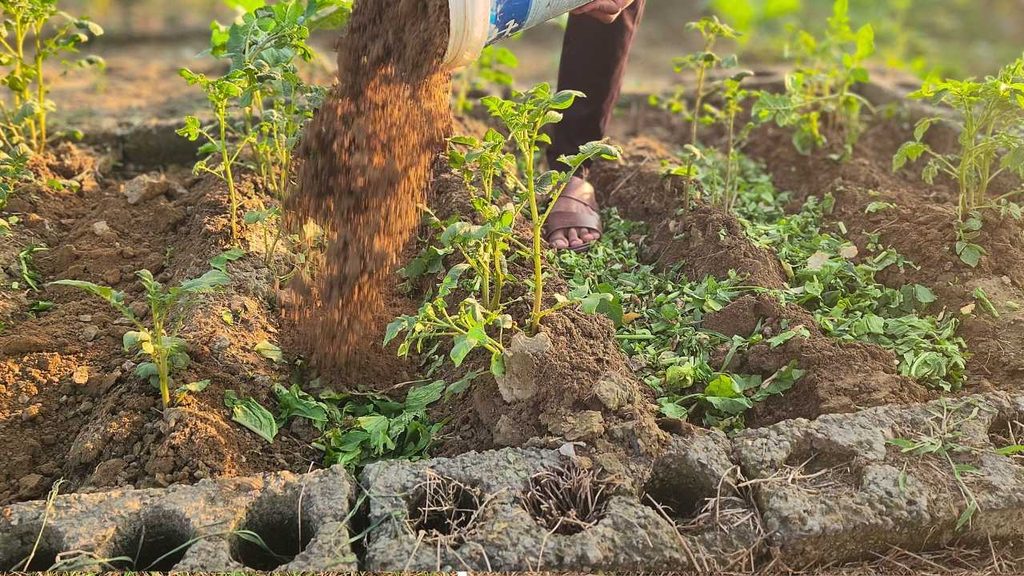
Spread the soil over the green material until everything is covered. There is no need to dig it deep into the ground or mix it with anything. Just make sure the leaves and kitchen waste are properly covered.
The reason I prefer covering this material is that it helps keep moisture around it. If you leave fresh leaves exposed, they can dry out quickly, especially during warm weather. Under the soil, they will stay moist and break down more easily.
Once we finish covering everything, we can move to the next step.
Mounding More Soil Around Potato Plants
Now we will take some more loamy garden soil and mound it around the potato plants.
If you look at the plants, you can see that their stems have grown above the original ridges. We need to add more soil around the lower parts of these plants. This is called mounding or hilling, and it is an important part of growing potatoes.
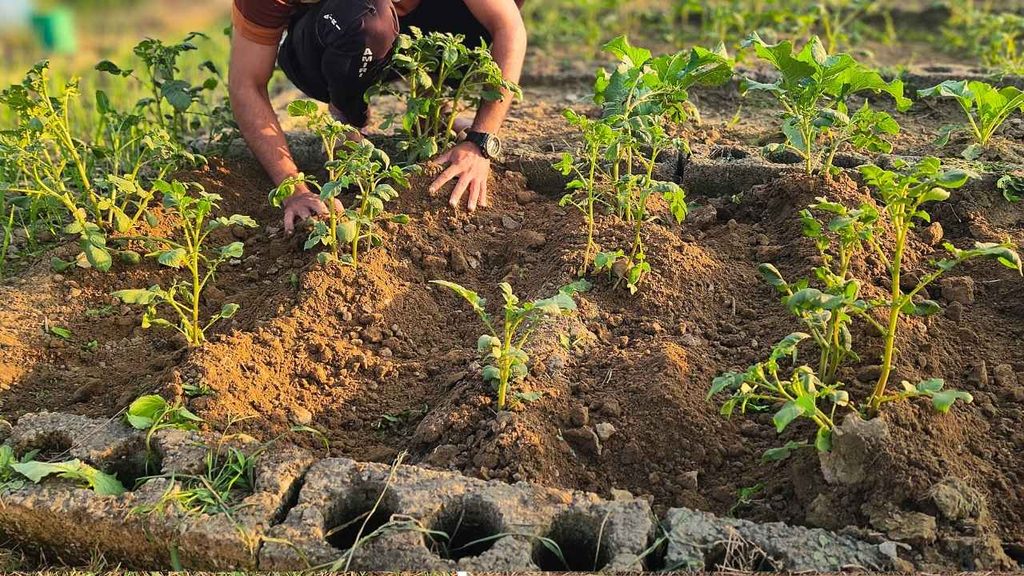
The main reason for doing this is to keep the developing potatoes covered with soil. As potatoes grow underground, some of them can get close to the surface. When sunlight reaches them, they can turn green. Green potatoes can contain higher levels of solanine and other unwanted compounds, so we don’t want them exposed.
Adding more soil around the plants also gives the developing tubers a deeper area of covered soil. It helps maintain the ridges and prevents potatoes from becoming exposed when the soil settles or gets washed away after watering or rain.
Take some garden soil and spread it around the base of each plant. You don’t need to make very high ridges all at once. Just add enough soil to cover the lower stems and build up the existing ridges.
Don’t bury the entire plant. Leave the upper leaves and growing tips above the soil so they can continue getting sunlight. Also, don’t press the soil too tightly around the stems. Just spread it gently and leave it loose.
If the plants continue growing and more of the lower stems become exposed, you can add another layer of soil later.
Watering the Potato Bed
After mounding all the plants, we will give the bed a good watering.
We usually add water in the empty spaces between the ridges rather than pouring it directly over the plants. This allows water to soak into the soil and reach the leaves and kitchen waste we buried earlier.
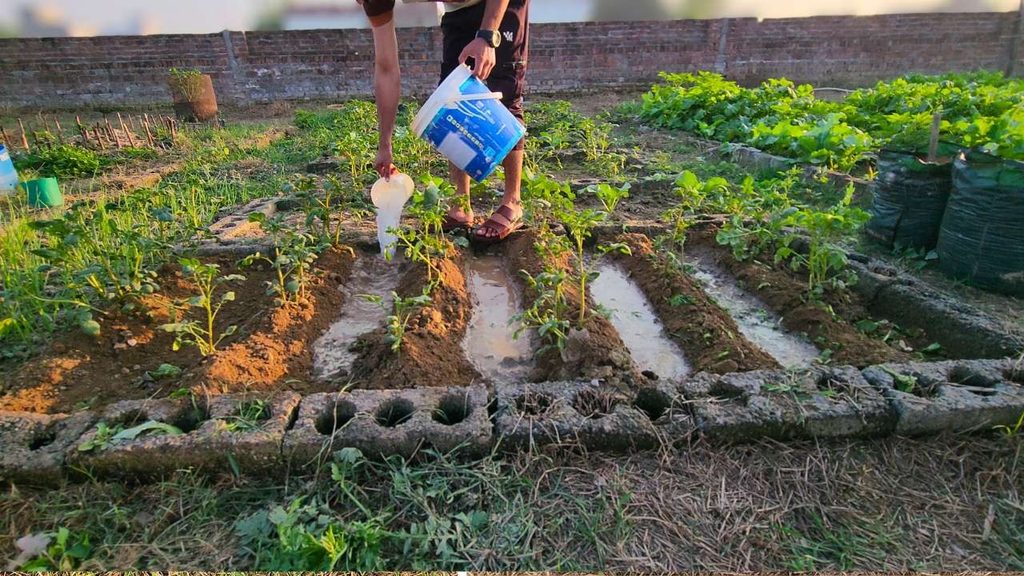
The moisture will help start the decomposition process. The microorganisms in the soil need moisture to break down the green material, so watering will help this process get started.
Give the bed enough water to moisten the soil around the plants and the buried organic material. There is no need to flood the empty spaces. Potato plants need regular moisture, but the soil should drain properly. Water sitting around the roots for too long can cause problems.
After watering, just keep an eye on the bed. If the weather is warm and the soil starts drying out, give it more water.
Keep Adding Soil When Needed
As the potato plants get taller, keep checking the ridges. Sometimes, after heavy watering or rain, soil can move away from the plants and developing potatoes may become exposed.
Whenever you notice this, add some more loamy soil around the plants. You don’t have to disturb the roots or dig around the ridges. Just cover the exposed areas.
The leaves and kitchen waste we added will take some time to break down, so don’t expect all their nutrients to become available immediately. They will slowly decompose underneath the soil and add organic matter to the bed.
This is a simple way to make better use of the empty spaces between potato ridges. We are using garden leaves and kitchen waste instead of throwing them away, covering them with ordinary garden soil, and adding more soil around the plants to keep the developing potatoes protected.
Most of the materials are already available in the garden, so there is very little extra cost involved.
Related Posts

Recent Posts
How to Improve Garden Soil Over Winter Using Kitchen Waste and Leaves
At the end of the growing season, when fall arrives and winter is about to start, this is what we do to prepare our garden beds for next spring. Instead of leaving the beds empty, we use this time to...
You don't need to buy a lot of compost or fertilizer to prepare a good garden bed. If you have leaves, kitchen scraps, and other plant waste, you can use them to improve your soil and feed future...