
A few months ago, back in spring, we made a simple composting system using two containers. We made holes all around one of the containers, buried it in the garden bed, and filled it with different kinds of organic matter and some compost. After filling it, we left it alone for a few months.
Now it is time to open it and see what has happened inside.
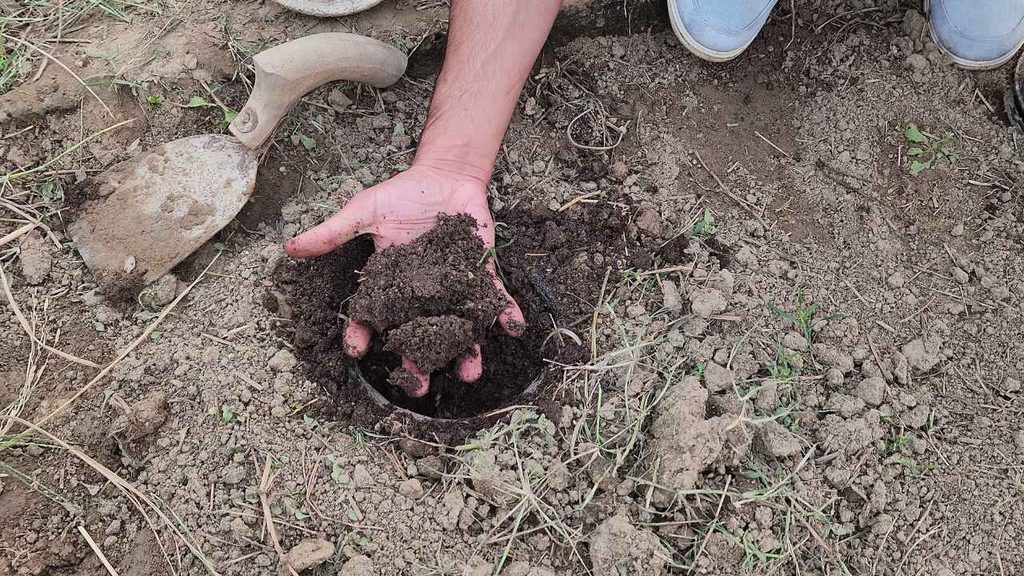
As you can see, the organic matter has broken down really well and turned into beautiful, dark compost. We have bought compost from garden stores before, but honestly, this homemade compost feels like something else. It is soft, dark, and full of decomposed organic matter.
We can take it out and sprinkle it around our plants or spread a thin layer over the garden beds. There is no need to mix it with anything else before using it.
After seeing how well the first container worked, we decided to make another one, but this time we are using a bigger container. We are going with a 5-gallon bucket because we want to make more compost and have extra space for kitchen scraps and garden waste.
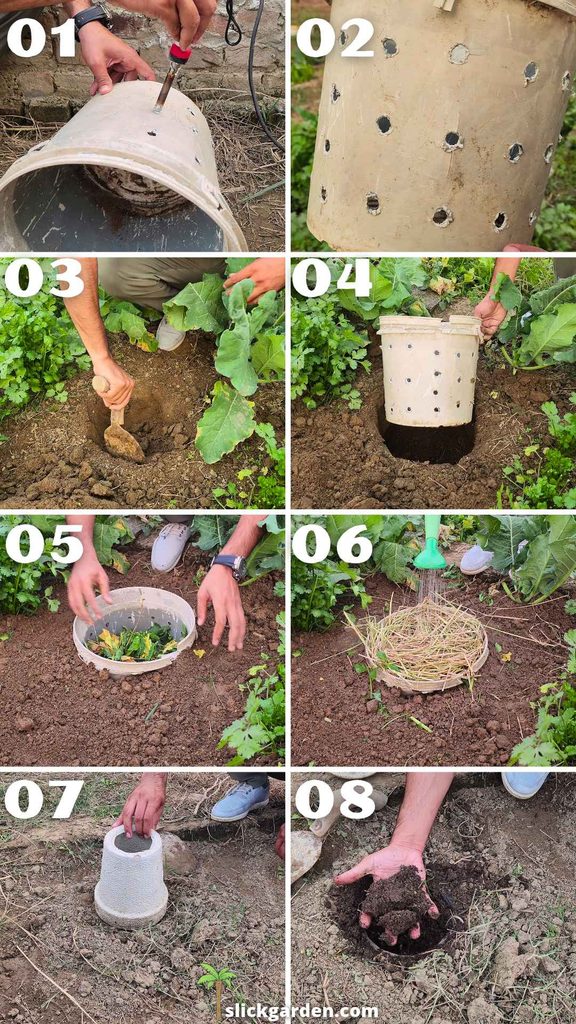
Why Use a Buried Bucket for Composting?
I like this method because we can make compost directly inside our garden beds. There is no need to carry kitchen waste to another place or maintain a separate compost pile.
The bucket has holes all around its sides. As rainwater or watering water passes through the organic matter, it can carry some dissolved nutrients through those holes into the surrounding soil. Nearby plants can use some of these nutrients through their roots.
Later, when the organic matter has broken down, we can also take out the finished compost and use it around the plants. So the same bucket gives us two things: nutrients for the surrounding soil and homemade compost.
Making Holes in the 5-Gallon Bucket
For this setup, we are using a regular 5-gallon plastic bucket. You can use another suitable container if you have one available, but make sure it is strong enough to hold the organic matter while buried in the soil.
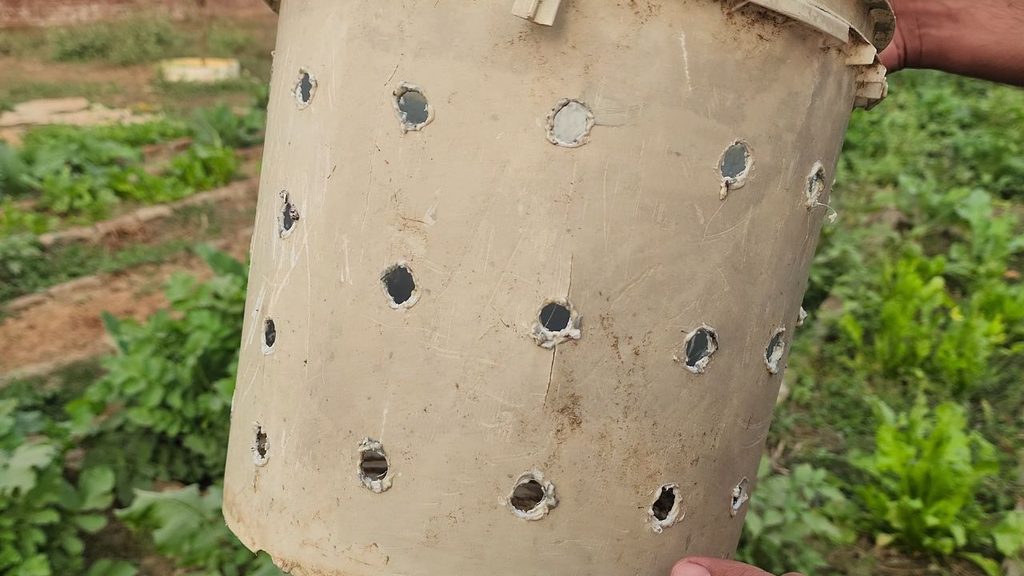
Start by making plenty of holes all around the bucket. We are making holes on the sides so water can move between the container and the surrounding soil.
Don’t make just two or three holes. Make enough holes around the container, leaving some space between them. They should be large enough for water to pass through without allowing too much of the organic matter to escape.
You can use a drill or another suitable tool to make them. Be careful while working with plastic, especially if you are using sharp tools.
Burying the Bucket in the Garden Bed
Choose a spot in your garden where you have some plants growing nearby. Dig a hole deep enough to bury most of the bucket, but leave its opening above the soil surface. This will make it easier to add more kitchen waste later.
Place the bucket inside the hole and fill the empty space around it with soil. Press the soil gently so the bucket stays in position.
Make sure you can easily reach the opening. You don’t want to dig up the whole container whenever you need to add more organic matter.
You can place it in an empty part of a garden bed where it won’t get in the way when you are planting or working around your vegetables.
What to Put Inside the Composting Bucket
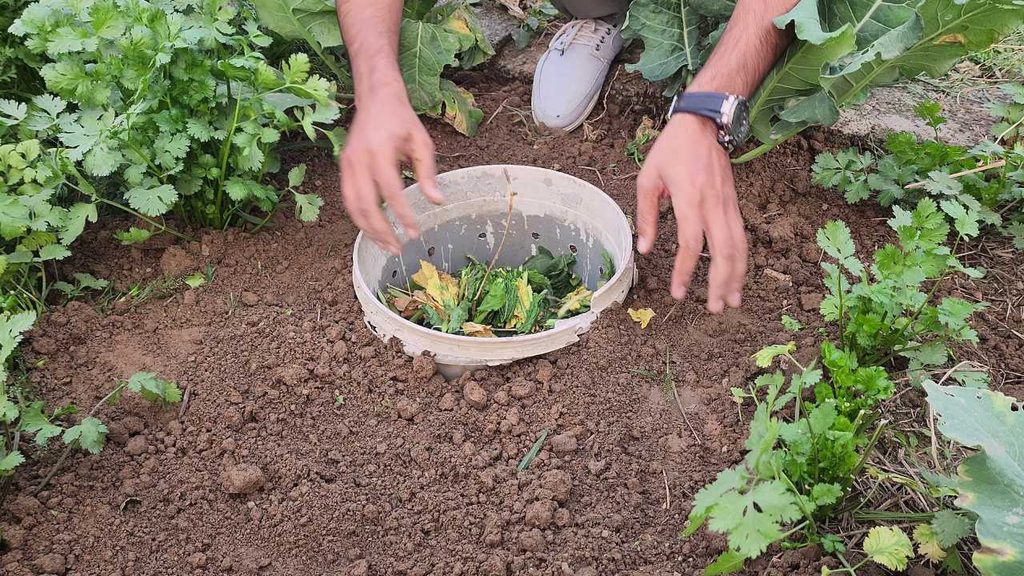
Now fill the bucket with organic matter. You can use many things that normally come out of your kitchen and garden.
We are adding kitchen waste such as fruit peels, vegetable scraps, and leftover plant materials. Dry leaves collected from the garden are also useful because they add dry material to the mixture.
You can also add fresh weeds, provided they haven’t developed mature seeds. Soft green garden waste breaks down well and adds more variety to the mixture.
Some materials you can use include:
- Fruit and vegetable peels
- Leftover vegetable scraps
- Dry fallen leaves
- Fresh weeds without mature seeds
- Small pieces of garden plants
- Used coffee grounds and tea leaves
- Small amounts of finished compost
- Regular garden soil
Try to mix fresh green materials with dry leaves. Kitchen scraps and fresh weeds usually contain a lot of moisture, while dry leaves help absorb some of that moisture.
Avoid adding meat, fish, dairy products, cooking oil, and greasy food leftovers. These can attract unwanted animals and create unpleasant smells, especially in a small buried container. Also avoid diseased plants, pet waste, and weeds carrying mature seeds.
You don’t have to collect everything before starting. Whenever you have suitable kitchen scraps or garden waste, you can add them to the bucket.
Adding Compost or Garden Soil
Along with the organic matter, add some finished compost. If you don’t have finished compost available, regular garden soil will also work. Both contain microorganisms that help break down the kitchen waste and garden materials.
You only need a small amount. Add some kitchen scraps first, then a handful of dry leaves, followed by a little compost or garden soil. Keep adding these materials in layers until the bucket is almost full.
Don’t press everything down tightly. Leave some space between the materials so air can move through the mixture.
If you add too many wet kitchen scraps without enough dry material, the mixture can become soggy and start smelling bad. We usually have plenty of fallen leaves in the garden, so adding some of those between the kitchen scraps is an easy way to balance the mixture.
Covering the Bucket With Mulch
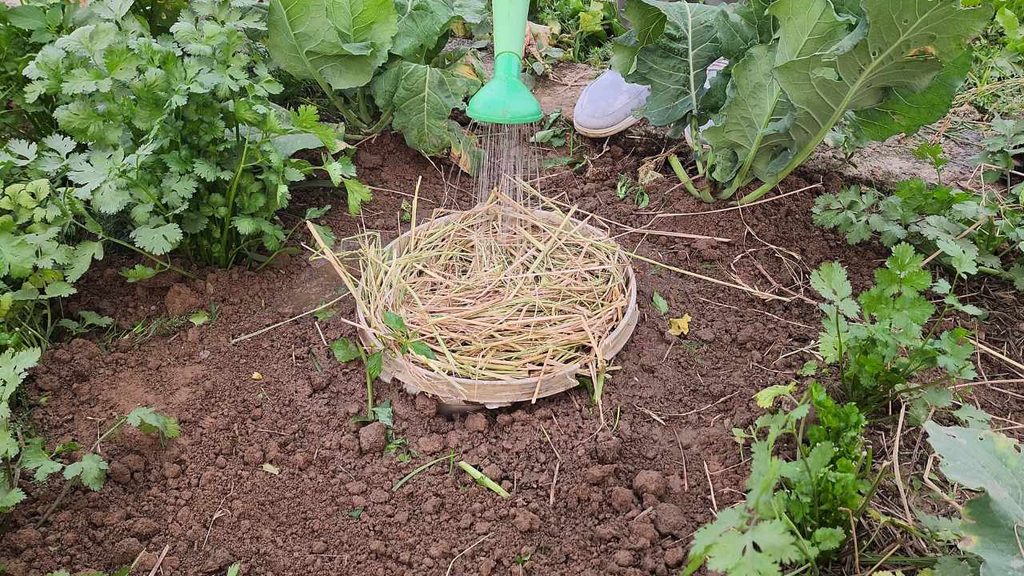
After filling the bucket, cover the top with a layer of mulch.
We are doing this because we don’t want mosquitoes using the open container as a breeding place. Standing water and exposed wet organic matter can create problems, especially during warm and rainy weather.
You can use dry leaves, straw, or another suitable garden mulch. Keep the cover loose enough to allow rainwater to reach the organic matter inside.
The opening should also remain easy to access. Whenever you have more kitchen scraps, you can move the mulch aside, add the waste, and cover it again.
How This System Feeds Nearby Plants
Whenever it rains or we water the garden, some water enters the bucket and passes through the organic matter. It can pick up soluble nutrients and carry them through the holes into the surrounding soil, where nearby plant roots can access them.
Of course, this doesn’t mean the bucket replaces regular watering or feeding. Plants still need good soil, sunlight, and enough water to grow properly. The amount of nutrients released also depends on the materials inside the bucket and how far they have broken down.
But it gives us another way to use kitchen scraps and garden waste instead of throwing them away.
Keeping the Composting Bucket Working
After filling the bucket, leave the organic matter to break down. You don’t need to keep disturbing it, but check the moisture from time to time.
If the contents become too dry, add some water. If they become too wet or start producing a strong unpleasant smell, add more dry leaves or shredded cardboard. These materials help absorb extra moisture and improve airflow.
You can keep adding fresh kitchen scraps and garden waste as the older material settles and creates more space.
During rainy weather, pay attention to how much water enters the bucket. Since it is buried in the soil, too much water can make the mixture soggy.
When to Harvest the Homemade Compost
The time needed to make finished compost depends on the materials you use, the temperature, moisture, and how much air is available inside the bucket.
Soft vegetable scraps and fresh leaves usually break down faster than thick stems and larger pieces of plant material.
After a few months, open the container and check the contents. If you can still recognise most of the kitchen scraps and leaves, give them more time.
When most of the material has turned dark, soft, and crumbly, it is ready to use. It should have an earthy smell rather than a rotten or unpleasant smell.
Take the finished compost out and spread it around your plants. You can also add it to the top of your garden beds before planting.
If some pieces have not completely broken down, you can leave them inside the bucket to continue decomposing. There is no need to remove everything at once.
Make More Compost Without a Separate Compost Pile
We have already seen what this simple system can produce, so we are planning to make more buried containers around our garden.
We have plenty of kitchen scraps, fallen leaves, and garden waste throughout the year. Instead of throwing all these materials away, we can put them inside these buckets and let them break down.
We started with a smaller container and got some really good compost from it. Now we are using bigger buckets because we want to make more for our garden.
It doesn’t take much to get started. A plastic bucket, some holes, kitchen waste, garden leaves, and a little compost are enough. We can keep adding waste as it becomes available and use the finished compost when our garden needs it.
Related Posts

Recent Posts
You don't need a large garden to grow potatoes. You can grow them in containers, raised beds, or even a homemade mesh garden bed. We are growing ours in a mesh bed that we made a few months ago, and...
How to Prepare Garden Soil for Spring Planting Using Organic Matter
One of our garden beds is completely covered with weeds and unwanted plants. We are going to clean it up and prepare it for spring planting. Since we still have a few months before the growing season...